


Table of contents:
When starting out in sewing, the positioning of the pattern pieces is an essential step that can make all the difference in the final result. Poor placement can lead to misaligned patterns, uneven drape, or poor symmetry. Those who have tried know that just a few millimeters of misalignment are enough to ruin the harmony of a garment. But don’t worry! In this article, we explain how to properly arrange and pin your pattern pieces depending on the type of fabric used.
How to correctly position and pin the pattern pieces?
To ensure precise cutting and harmonious assembly, here are some essential guidelines to follow:
- The grainline : indicates the correct orientation of the piece on the fabric.
- The fold symbol : used to place certain pieces on fabric folded in two.
- The number of pieces to cut : indicates whether the fabric should be single or double thickness.
Some pattern pieces have the fold symbol, which means they must be placed on the folded edge of the fabric.
- This generally concerns the center of the front or back pieces of a garment that must be placed on the fabric fold.
- The grainline must be parallel to the fabric's selvage to ensure a straight cut. If you deem it necessary, pin the fabric so it is well secured.
- Pinning the pins : pin the ends of the pattern ensuring it lies flat, then add pins in between.
- Be careful that the pins do not stick out too much fabric so as not to damage the scissors' blades.

When the pattern piece does not have a fold symbol , it must be aligned thanks to the grainline .
- Place the piece on the fabric , avoiding placing it too close to the selvages which can be distorted.
- Using a ruler : measure the distance between one end of the grainline arrow and the fabric selvage. Mark this exact value on the other side of the arrow to ensure perfect alignment.
- Once the positioning is confirmed, pin all around the edge of the piece so that it stays firmly in place before cutting.

How to cut velvet fabric and fabrics with directional patterns?
If your fabric has a particular grain (like velvet which has a different light effect depending on the direction of the nap), all pattern pieces must be positioned in the same direction to ensure uniformity of color and texture.

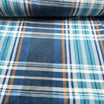
How to properly arrange pattern pieces on a fabric with horizontal stripes?
Fabrics with horizontal stripes require special attention to align the patterns and avoid any unsightly misalignment. Poor stripe matching can turn a chic piece into a visual disaster!
- Preparation and Cutting
First of all, fold your fabric lengthwise. Check that the stripes overlap perfectly. If they tend to slip or not align naturally, pin the fabric on the selvages to stabilize everything.

- Properly Position the Pattern
Start by placing and pinning the front bodice and the front skirt . Make sure the bottom of the neckline is located exactly on a stripe. If you cut on the fabric fold, it is best to pin your two layers together, making sure the lines match perfectly.

- Ensuring a Discreet Hem
A detail often overlooked: The hem must be sewn in a thread color that matches the stripe in question. Thus, the seam blends into the fabric and remains discreet, without altering the overall aesthetic of the garment.
- The Importance of Marks and Notches
Marks are your best allies. When you assemble the bodice and the skirt, mark the placement of the stripes on the pattern pieces. This ensures that everything fits perfectly at sewing time.
- Sleeve Assembly
For flawless sleeves, align the stripes at the bottom of the armhole with those of the bodice, respecting the assembly notches. This is an essential detail for the final result to be smooth and harmonious.

Ultimate tip : Always ensure that the notches that come together during sewing correspond each time to a stripe of the same color.
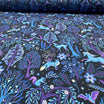
How to properly place the Pattern on vertically striped and checked fabrics
Here, the difficulty lies in preserve the alignment of the patterns while taking into account the cuts and shapes of the garment.
- Regular Stripes and Checks: The Bias Technique
If your fabric has regular patterns , fold it lengthwise as for horizontal stripes. Then, fold the fabric face to face and position it at 45° to align the checks diagonally.
- How to Manage Irregular Stripes?
If the stripes or checks are irregular , the method differs. Here, you need to determine the central stripe and use it as a reference for the entire garment construction. This ensures overall harmony, even if some parts do not align perfectly.
Conclusion
Whether you are working with solid fabrics, stripes, checks, or specific patterns, the placement of pattern pieces is a key step for a well-cut garment. Take the time to properly align your patterns, securely pin your pieces and always check before cutting !
And you, what are your tips for properly positioning your patterns on the fabric? Share them in the comments!
Leave a comment
All comments are moderated before being published.
This site is protected by hCaptcha and the hCaptcha Privacy Policy and Terms of Service apply.