

JUKI MO-2000QVP overlocker
Master the art of threading with our detailed guide to the JUKI MO-2000QVP overlocker . Follow the instructions step by step for easy preparation, ensuring perfect seams. Dive into this sewing essential with confidence!
The MO-2000QVP overlocker revolutionized the sewing industry with its air threading system. Discover how this innovative overlocker can improve your sewing experience and help you achieve impeccable finishes.
In this blog, we will explain step by step a crucial element of threading the JUKI MO-2000QVP overlocker.
Putting on the JUKI MO-2000QVP
Follow this step-by-step tutorial to make it easier to thread your JUKI MO-2000QVP overlocker. Thanks to this detailed guide, you will be able to operate your machine with exceptional ease. Learn the essential tips and techniques to achieve flawless results with every seam.
Optimize your overlocker threading experience with this explanatory video.
Step 1: First make sure your overlocker is turned off. You will place your 4 coils on the coil wedges. Do not hesitate to use the spool colors listed on the machine the first time you use it to help you find your way better thanks to the color code.
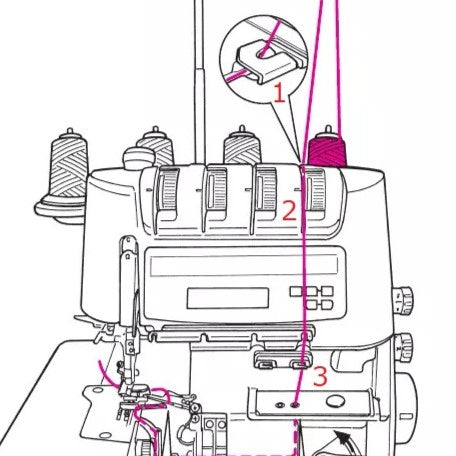
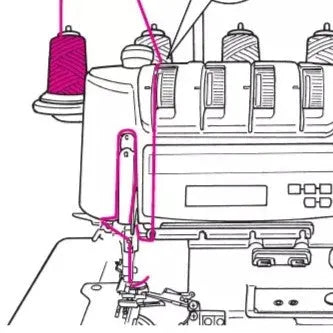
Step 2: Once you have passed the red thread corresponding to the lower looper through its first hook (1), pass it through its respective thread guide slot (2) then through the 2nd hook (3).
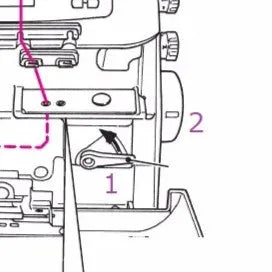
Step 3: Remember to lift the lever and turn the steering wheel until you hear a click. This will allow the looper threads to pass through the threading mechanism of the machine.
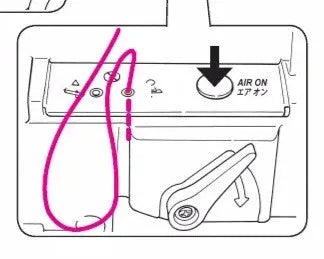
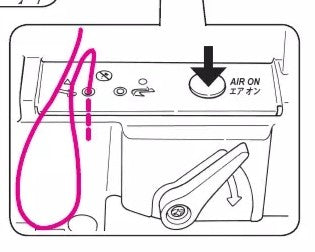
Step 4: Pull approximately 20 to 30 cm of thread, pass approximately 2 cm of the red thread through the left hole then press the " AIR ON " button. The lower looper will be automatically threaded thanks to a large push of air in its mechanism.
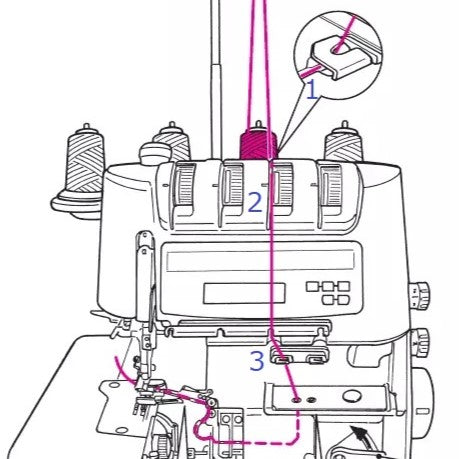
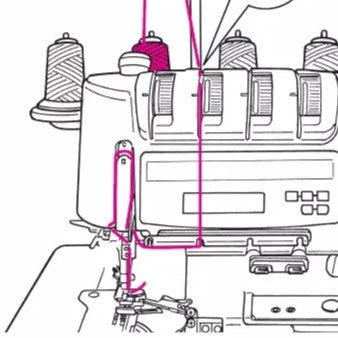
Repeat steps 2 and 4 for the blue thread corresponding to the upper looper.
Once the two threads are threaded into their respective loopers, all you have to do is lower the lever.
Step 5: It's time to tackle the needle threads. Pass the yellow thread corresponding to the left needle through its thread guide and then through its respective hook. Then, use the automatic needle threader to pass the yellow thread through the eye of the left needle. Do the same with the green thread, it will pass through the eye of the right needle.
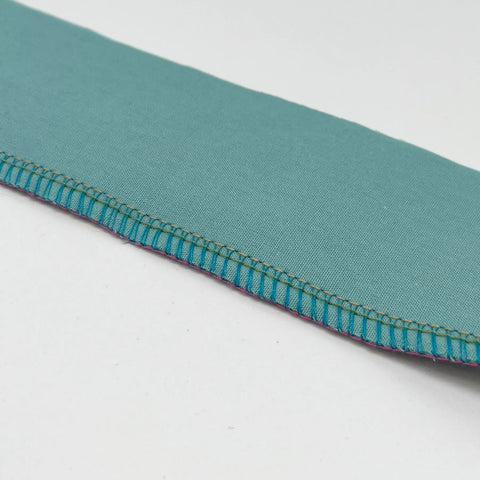
Now you have successfully threaded your overlocker! You are ready to get started on your sewing projects!
Here is the result you will get from your sewing:
The features of the JUKI MO-2000QVP overlocker
Description:
The overlocker is equipped with a needle threader, an LCD screen for setting 15 stitches, a waste bin and a safety switch.
Features:
- Sewing speed: max. 1500 sti/min
- Number of threads: overlock 2/3/4
- Stitch length: max. 4mm
- Stitch width: left needle 5-9 mm / right needle 3-7 mm / rolled edge 2 mm
- Presser foot height: 5 mm / 8 mm
- Needle: 130/750H (HAx1) 70-90
- Dimensions: 330 (L) * 280 (W) * 310 (H) mm
- Weight: 9kg
We offer several simple tutorials on our blog if you are new to sewing, also find us on Facebook , Instagram and TikTok !