


Table of contents:
The capucin placket, often used on shirts and cuffs, is distinguished by its neat finish in the shape of a triangle or rectangle. It adds an elegant and professional touch to garments. Follow this detailed guide to learn how to make this placket precisely.
How to prepare the pattern?
Mark the placement of the placket
- On the fabric, draw a center front line corresponding to the opening.
- Mark the height of the capucin placket and draw the lines defining its width.
- Connect the lines with a perpendicular at the bottom and add a small triangle at the base.
Example dimensions:
- Height (H) = 12 cm + seam allowance → 13 cm
- Width (L) = 3 cm
Cut out the placket piece
The capucin placket consists of a single piece of fabric. Its width corresponds to the folds that will be made to achieve the finish.
- Placket height (Hp) = H + extra margin
- Capucin = 3 cm height
Example:
- Hp = 13 cm + 0.7 cm → 16.7 cm
- Total width = (L × 3) + 0.7 cm → 16.4 cm

Why and how to fuse the placket?
Reinforce the fabric with fusible interfacing
- On the wrong side of the fabric, fuse the base of the placket to prevent any distortion.
- On the wrong side of the placket, apply fusible interfacing on each side of the red line.

Pre-shape the hood
Fold the tip of the hood right sides together and stitch 0.7 cm from the edge. Clip and turn to get a neat finish.


How to position and sew the placket?
Place the placket on the fabric
- Transfer the placket marks onto the wrong side of the fabric.
- Position the placket right side against wrong side on the center front, aligning the marks well.
- Pin carefully to ensure good hold.

Make the first stitch
- Sew along the outline of the marking, starting and ending at the neckline.
- Use a straight stitch length 2.5 and secure the corners with backstitches.

How to open and turn the placket?
Cut and trim the seam allowances
- Open the center line down to the bottom of the neckline.
- Cut diagonally on the sides of the triangle without going beyond the stitching lines.
- Trim the seam allowances to achieve a uniform width of about 0.7 cm.


Turn and secure the placket
- Fold the seam allowances inward and press the seams open with an iron.
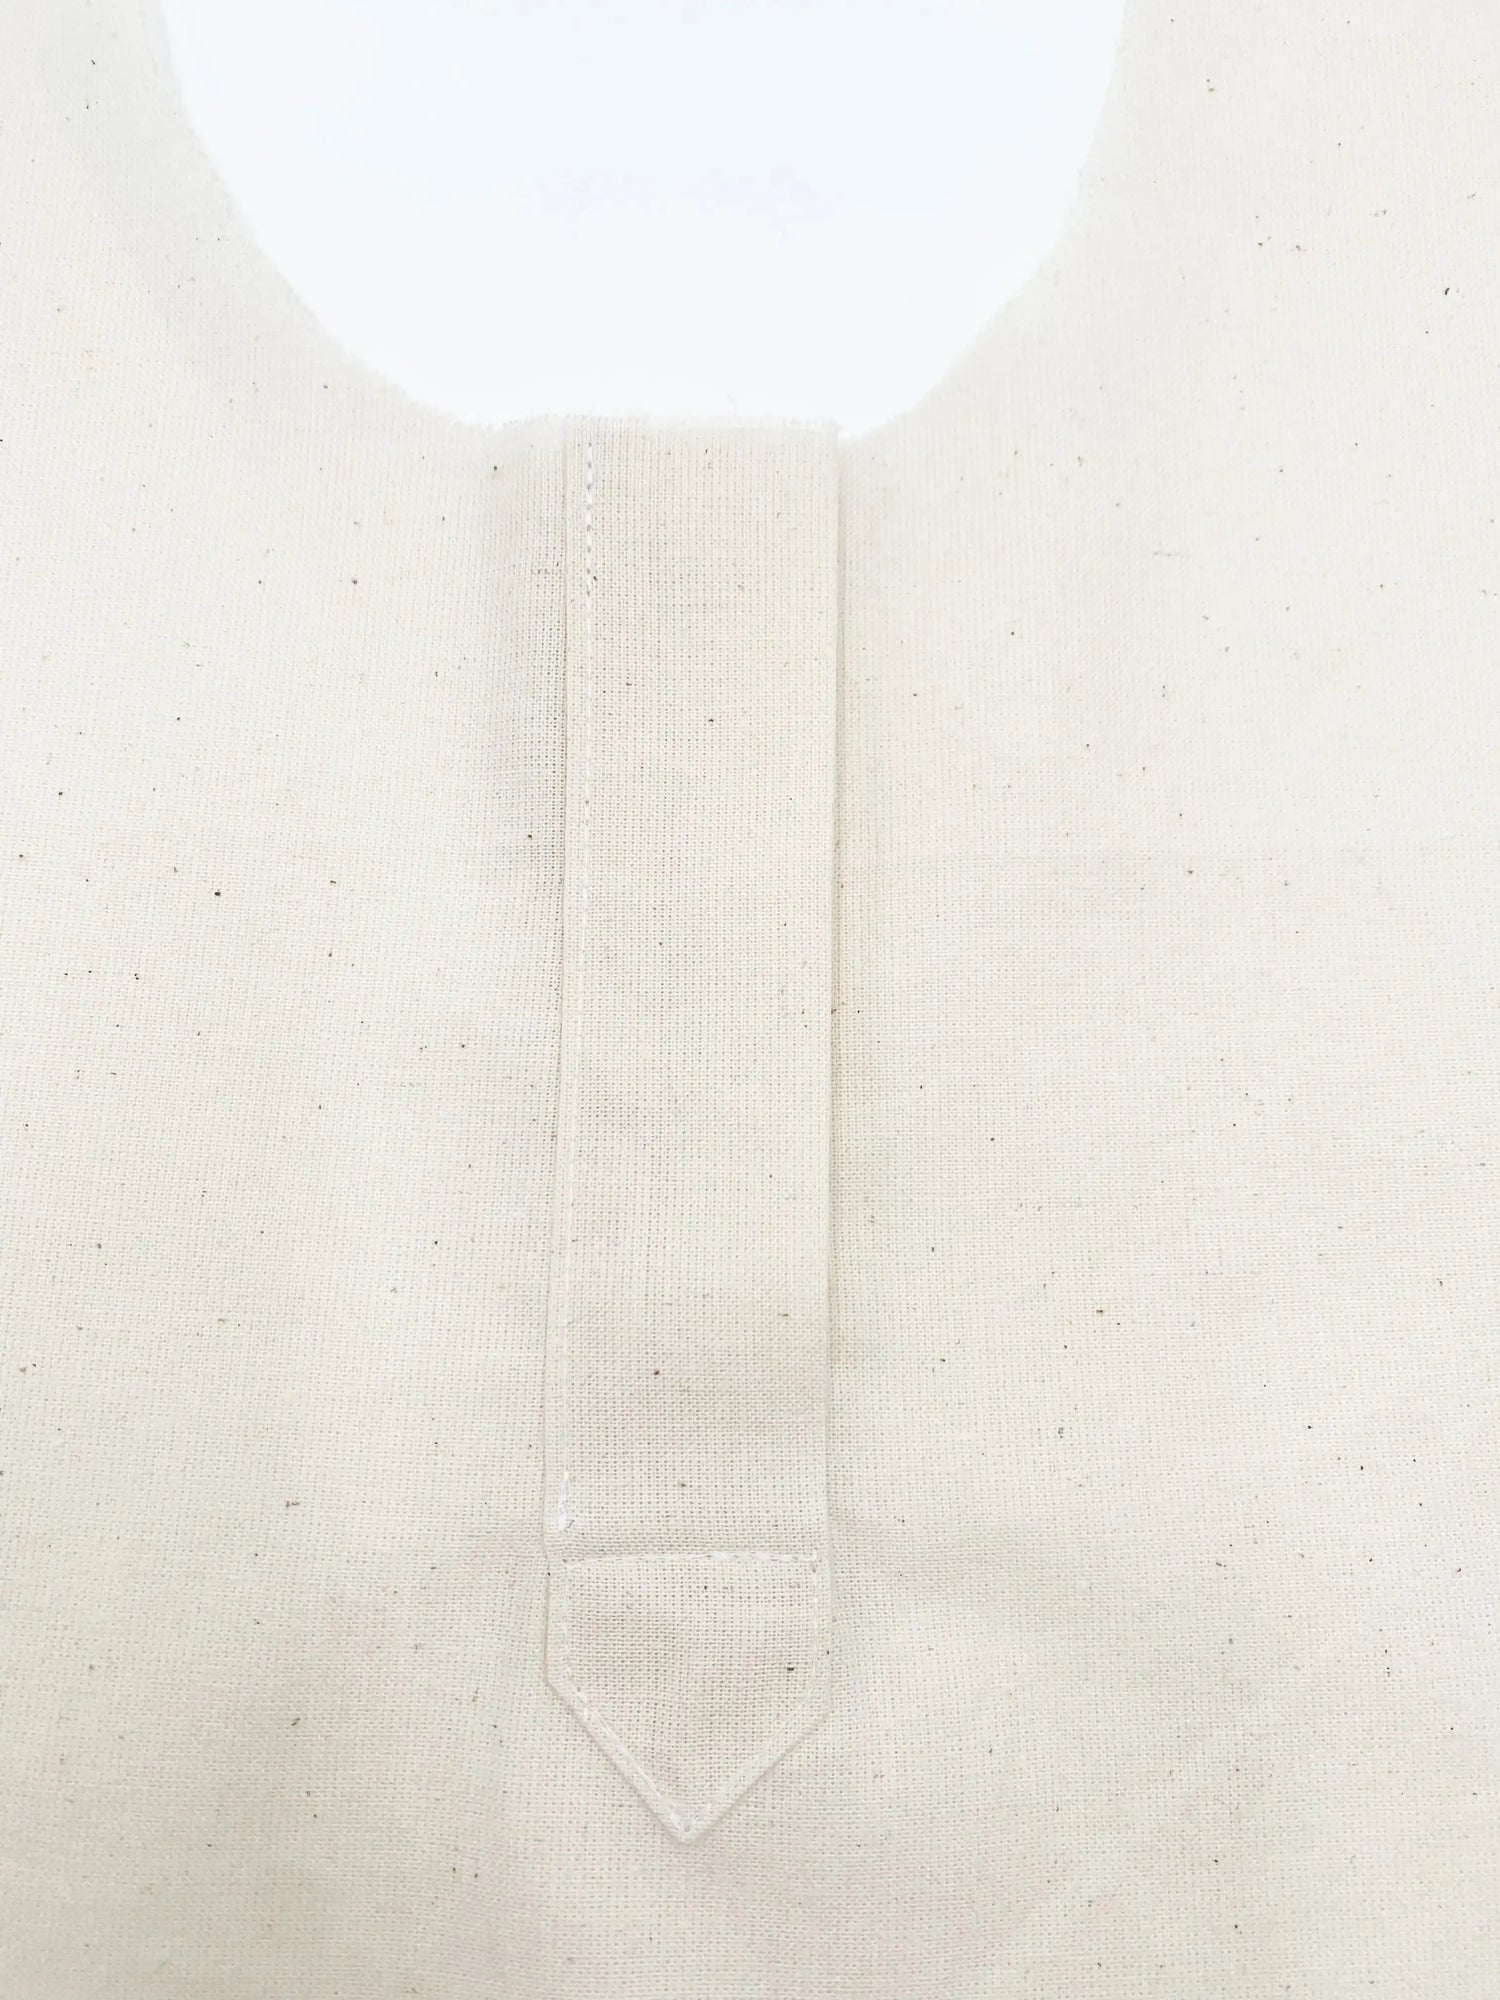
- Turn the placket to the right side of the fabric and press it carefully.
- Check that the front fabric is well hidden under the placket.


How to finish the capucin placket?
Overlap and baste the placket
- Overlap the placket with capucin over the one without capucin.
- The first should perfectly cover the second. If not, adjust the seam allowance.
- Sew 1 or 2 mm from the edge of the placket without capucin to secure it. If necessary, baste before sewing 3 or 4 mm from the edge, keeping the layers well together.


- Along the height of the placket, pin or baste the part with capucin.

Topstitch and permanently secure the placket
- Place the garment right side out and apply the topstitching following the indicated line.
- Step 1 : Start from the neckline, without stitching the placket without capucin.
- Step 2 : Then follow the tip of the capucin and stitch through all the layers.
- Step 3 : Continue on the opposite edge up to about 0.7 cm above the bottom of the placket without capucin.
- Step 4 : Finish with a horizontal stitch resting on the first edge to securely hold the whole.
- Tie the threads and tuck them into the layers for a clean finish.
Final step: final ironing
- Remove the basting thread and do a final ironing to flatten the placket well.
- Check that the placket is well positioned and that all topstitching is neat.


Conclusion
The capucin placket is an elegant and technical finish, perfect for shirts and cuffs. It is particularly well suited to fabrics with a tartan pattern, where its clean structure highlights the alignment of the checks. By following these steps, you will achieve a neat, well-structured, and durable placket. Good preparation and careful ironing are essential for a professional result!

Leave a comment
This site is protected by hCaptcha and the hCaptcha Privacy Policy and Terms of Service apply.