


Table of contents:
Discover how to add a touch of style to your canine companion by learning to sew a dog bandana tutorial.
Our dogs also need a refresh in their wardrobes. 🐶
In this easy and quick tutorial, we show you how to sew a bandana for your dog if you want to personalize their collar or match it to your own outfits!
Here is the list of materials you will need:
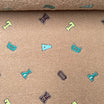
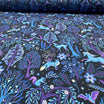
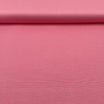
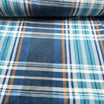
- fabric
- A pair of scissors
- clips
- thread
- A sewing machine
- Bandana pattern
A little tip: for the sewing machine, we recommend choosing a Juki sewing machine model. These machines are known for their sturdiness, precision, and reliability, whether you are a beginner or a more experienced seamstress. They ensure smooth sewing, even on thick or technical fabrics like those used for dog accessories.
We also offer a pre-made pattern for small and medium dogs! If your dog is large, then the pattern measurements should be adjusted according to the width of your dog's collar, and for that, you need to increase the height of the pattern. For Rainbow's pattern, we measured 24 cm for the length and 19 cm for the height. 😉
Step 1: Pin the dog bandana tutorial pattern onto your fabric, then cut 2 pieces of the panel.

Step 2: Join the 2 panels right sides together, leaving an opening along the length, then sew everything while still leaving the length open. For a professional finish, consider using a Juki flatlock machine, ideal for this type of precise sewing.

Step 3: Turn your work right side out to see the good side of your fabric.
Step 4: Join the length with an inner hem then sew. Your bandana must be completely sewn so there should be no opening at this stage! You can use a Juki coverstitch machine for neat and professional finishes. It is ideal for making strong and attractive hems.

Step 5: To create a kind of hem that will allow the dog's collar to pass through, measure the collar leaving a small space so it can slide through easily later as shown in the image below. Pin then topstitch along the entire length.

Slide the collar through the tube and there you go! You can finally beautify your dog with this wonderful dog bandana tutorial made by your own hands!
Look at this superhero!!

Leave a comment
This site is protected by hCaptcha and the hCaptcha Privacy Policy and Terms of Service apply.