


Table of contents:
There is nothing more frustrating than seeing your efforts ruined by sewing machine loops that coil under the fabric or rebel on the surface. These imperfections, often caused by a conflict between the upper thread tension and the bobbin tension, distracted threading, or a dull needle, turn the joy of creating into an obstacle course. If you wonder why my sewing machine makes loops, know that the answer is very often hidden in these precise settings.
Learn to decode each symptom, adjust the settings precisely on a fabric scrap, and regain full control of your stitches.
Why does your sewing machine make loops?
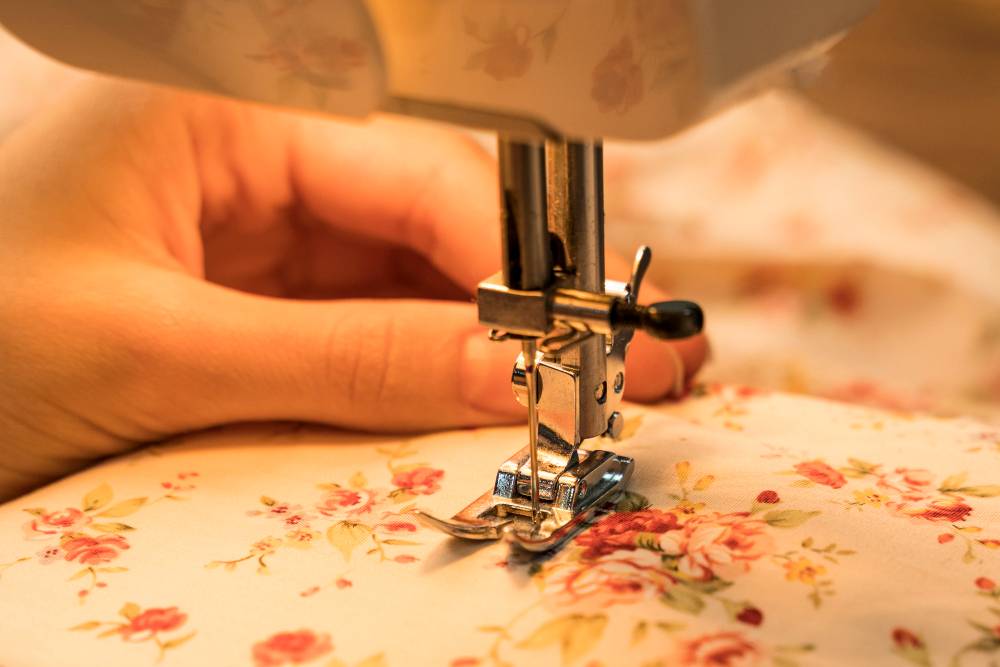
You start sewing but notice unsightly loops under the fabric? Rest assured, this problem is common and even affects experienced seamstresses. These loops indicate an imbalance between the upper thread and the bobbin thread, often related to incorrect tension, improper threading, or lack of maintenance. With a few simple adjustments, you will regain clean stitches in no time.
Loops are not a mystery. In fact, they signal a conflict between two essential elements. If the upper thread is too loose, it accumulates in loops. As for the bobbin that is poorly tensioned, the lower thread dominates and creates visible bumps. Even a dirty bobbin case or a damaged thread can cause this disorder.
The perfect stitch is recognized by a perfect balance with the two threads crossing in the middle of the fabric without imprinting on either side. We help you identify the exact cause and fix it without stress.
We will first explore how to analyze loops to understand their origin. Then, you will learn how to check the upper thread and bobbin tension, redo the threading step by step, and clean the critical areas of the machine.
Simple tips, like observing the direction of the loops (under the fabric or on top), will help diagnose the problem precisely. Say goodbye to irregular seams and turn your mistakes into success!

Diagnose the problem: are the loops above or below the fabric?
Loops on your seams reveal a tension imbalance in the machine. Start by observing whether these loops appear under or on the fabric. This analysis directly targets the source of the problem.
Loops under the fabric indicate an upper thread that is too loose. This results from insufficient tension or incorrect threading. A common oversight is when the thread is not passed through the needle bar thread guide. Check each threading step to identify the error.
Conversely, loops on the top of the fabric indicate a poorly tensioned bobbin thread. The upper thread tension may be too high, or the bobbin tension insufficient. A common case: a bobbin thread wound by hand instead of the winder, which creates irregular tension.
To validate your adjustments, always test on a scrap of fabric identical to your project. This isolates the parameters responsible for the problem, as fabric thickness influences the ideal tension.
|
Quick loop diagnostic chart |
|||
|
Visual symptom (Where are the loops?) |
Source of the problem |
Most likely cause |
First action to check |
|
Loose loops and visible knots under the fabric |
Upper thread |
Upper thread tension too low or incorrect threading |
Check the complete threading of the upper thread and increase its tension. |
|
Loose loops and visible knots on the top of the fabric |
Bobbin thread |
Upper thread tension too high or bobbin tension too low |
Reduce the upper thread tension or check the bobbin tension/installation. |
Regular cleaning of the tension discs and the bobbin compartment prevents irregular tensions. If in doubt, a professional service remains a reliable solution.
Want to sew your own clothes? Sign up for Verotex training courses to master the sewing machine in no time.
The number 1 cause of loops: incorrect tension adjustment
When a sewing machine produces loops under the fabric, the problem often comes from an imbalance between the tension of the upper thread and that of the bobbin thread. The perfect stitch interlocks within the layers, invisible on the front or back. An improper adjustment disrupts this balance and creates unsightly loops.
How to adjust the upper thread tension?
The tension dial, usually numbered, allows you to tighten (high number) or loosen (low number) the upper thread. Start with the standard value (often 4 or 5). For thick fabrics (canvas), a slightly higher tension (6-7) may be necessary.
For fine fabrics (silk), favor 3-4. If loops appear under the fabric, gradually increase the tension (5 → 6) and test after each change.
The yo-yo test to check the bobbin
Adjusting the bobbin thread tension is less frequent. For removable cases, perform the yo-yo test: hang the bobbin by its thread and give it a shake. If it drops slightly, the tension is good.
If it falls, tighten the screw (clockwise). If it stays still, loosen it (counterclockwise). For horizontal bobbins, check their positioning: a poorly inserted case causes loops.
Here is how to proceed:
- Prepare a sample with the fabric and threads of the project.
- Set the upper tension to 4 or 5 (standard value).
- Sew a straight line of a few centimeters.
- Observe both sides: spot loops on top or bottom.
- Adjust the tension: increase (5 → 6) if loops are under the fabric.
- Decrease (5 → 3) if loops appear on the top.
- Repeat until you get an invisible and balanced stitch.
When and how to adjust the tension?
Test on a sample, especially for unusual fabrics. Electronic machines sometimes have an "auto" mode, but manual adjustment is sometimes still necessary. Regularly clean the tension discs and the bobbin case, as dust disrupts the thread passage.
Check the needle, because if it is dull or improperly inserted, it may disrupt the tensions. When in doubt, rethread the machine before adjusting the bobbin, as incorrect threading is often the main cause of loops.
Go from beginner to expert. Our courses at Verotex will guide you to use your sewing machine like never before.

Beyond tension: other common causes of loops
You have checked the thread tension, yet loops persist? Other factors deserve your attention. Discover the common mistakes that turn your work into a knotty mess.
Incorrect threading of the upper thread
Most threading problems come from a forgotten step: the presser foot must be raised during threading. This releases the tension discs, allowing the thread to position correctly. Forgetting this is like trying to pass a necklace through a ring without opening the clasp!
Always check that the thread passes through all the guides, including the thread take-up lever. Missing a guide creates uneven friction that causes loops. Need a reference? Check the threading diagram in your machine's manual.
Problems related to the bobbin
A poorly inserted bobbin overturns the laws of sewing. The thread must wind in the correct direction (usually counterclockwise for horizontal bobbins). A poorly wound bobbin, with loose or misaligned thread, releases its thread chaotically.
Inspect your bobbin, as scratches, deformation, or poorly oriented thread are enough to disrupt the stitch. If the case is damaged, even slightly, replace it. A case unsuitable for your machine acts like a bad dance partner who always ends up tripping the step.
The unsuitable thread and needle pair
A thick thread with a fine needle is a recipe for excessive tension. Conversely, a fine thread in a large needle moves without precise guidance. The needle size must match the thread diameter, like a lock to its key.
A dull or bent needle worsens the problem because it forces the thread to twist or break. Change the needle as soon as you feel any snagging during stitching.
Ask yourself these questions to see if the thread and needle pair is working well:
- Is the presser foot properly raised during threading?
- Does the upper thread pass through ALL the guides, including the take-up lever?
- Is the bobbin inserted in the correct direction of rotation?
- Is the bobbin thread wound smoothly and evenly?
- Is the needle suitable for both the fabric AND the thread? Is it in good condition?
By adjusting these parameters, you eliminate 90% of mysterious loops. Once these steps are validated, even the most finicky fabrics will hold no secrets for you.
The influence of fabric and the specifics of your machine
Wondering why your sewing machine makes loops even though you follow all the steps correctly? Often, the answer lies in the choice of fabric and the settings adapted to your machine. Between the influence of the presser foot, the sewing technique used, and the differences between mechanical and electronic models, every detail can turn your sewing experience into success or frustration.
The impact of fabric type
The type of fabric directly influences the appearance of loops. Fine or slippery fabrics like silk require a microtex needle and reduced tension to avoid irregular stitches. Choose a fine polyester thread (50/2) for these delicate fabrics, as its flexibility reduces friction.
For thick fabrics (denim, faux leather), use a strong needle (90/14 or 100/16) and a thicker thread (60/2 or 40/2) and slightly increase the upper thread tension (around 4.5-5 on a scale of 1 to 9) to compensate for thickness. A presser foot for thick fabrics facilitates feeding without distorting the fabric.
Stretch fabrics (jersey) stretch during sewing. Prefer a stretch or ballpoint needle (70/10 or 90/14) and an elastic stitch (light zigzag or overlock) to prevent the stitch from breaking. Reduce the presser foot pressure to avoid crushing the fabric, especially with manually adjustable models.
At Verotex, you will find all the types of fabrics you need.
The role of the presser foot and technique
The standard presser foot is not always optimal. Dual-feed feet (like the walking foot) are better suited for thick fabrics, while Teflon feet glide over synthetic materials. Variable opening feet adapt to changing thicknesses, such as topstitching.
Avoid forcing the fabric and let the machine control the feed, as rough handling disrupts thread tension. Stabilize slippery fabrics with double-sided tape or a layer of tulle before sewing. For thick fabrics, slightly lift the presser foot edge to ease the passage of layers.
The differences between mechanical and electronic machines
Mechanical machines require preliminary tests on a fabric swatch. Repetitive looping often indicates incomplete threading or clogging. Regularly clean the bobbin case with a soft-bristle brush to prevent lint buildup.
Electronic models sometimes have automatic tension sensors. In case of loops, check that the optical sensor is not blocked by residues. Some display error codes (e.g., "thread error") indicating a threading problem. Use the "automatic cleaning" option if available, following the manual’s instructions.
Whatever the type of machine, regular cleaning of the thread guides and bobbin case remains essential. Lint buildup systematically disrupts thread tension. Release the upper thread tension at the end of sewing to avoid thread backlashes.

Preventing loops: good maintenance habits
Loops under the fabric are often avoidable. A well-maintained machine reduces these errors. Did you know that lint or a worn needle can cause problems? Here are simple actions to avoid these issues:
Regular cleaning is essential
Thread residues and lint accumulate in the bobbin and under the needle plate. After each project, dust these areas with the provided brush and don’t forget the feed dogs, as they influence the stitch quality.
Needle replacement
A dull needle affects tension. Change it every 8 to 10 hours of sewing. Check its correct positioning: it must be straight and properly engaged. A new needle prevents slipping on all fabrics.
Lubrication
Oil only the moving metal parts, like the needle shaft, and consult your manual for exact points. Use 1 to 2 drops of specific oil, avoiding excess. Light lubrication improves the lower thread glide.
Your maintenance routine for trouble-free sewing:
- Dust off the bobbin after each project.
- Change the needle before a new garment or after 8 hours of use.
- Use good quality threads without excess lint.
- Test on a sample before the final sewing.
- Store the machine away from dust with its cover.
By following these steps, you will reduce the risk of loops and extend the life of your machine. Adopt these simple actions for clean stitches every time.
Machine sewing loops are a common problem, but easy to fix with the right steps. By adjusting the tension, checking the threading and bobbin, and adapting your equipment to the fabric, you will achieve a clean stitch. A well-maintained machine and preliminary tests guarantee perfect results.


Leave a comment
All comments are moderated before being published.
This site is protected by hCaptcha and the hCaptcha Privacy Policy and Terms of Service apply.