


table of contents:
Mastering sewing machine tension is important for any sewer, whether beginner or experienced. Improperly adjusted tension can be a source of frustration when completing a sewing project, resulting in loose stitches , unwanted puckering , or even thread breakage.
Learn here how to perfectly adjust the tension on your sewing machine and discover the different types of adjustments available. We'll also provide you with practical tips for achieving flawless seams every time .
Understanding Sewing Machine Tension
Mastering sewing machine tension is essential for achieving neat and even seams . This often misunderstood setting plays a central role in the proper functioning of the machine. Let's discover what tension is, how it affects thread balance, how to spot the signs of poor adjustment, and what elements can influence this delicate but fundamental parameter.

Definition and role of tension
Sewing machine tension is the force exerted on the thread when sewing. It must balance the top and bobbin threads to obtain even stitches .
The tension system uses discs and a spring to control the thread strength. A good balance between the upper and lower thread results in strong, attractive stitches .
How does voltage balance work?
A stitch is formed when the two threads intertwine in the middle of the fabric. The balance depends on the dial setting and the bobbin thread tension.
|
Characteristics of Balanced vs. Unbalanced Tension on a Sewing Machine |
|||
|
Voltage type |
Visual characteristics |
Practical consequences |
|
|
Balanced voltage |
Regular and stable points |
Balance between top thread and bobbin thread, |
|
|
Upper tension too loose |
Loops of thread on the underside, |
Loose stitches, risk of tearing, |
|
|
Upper tension too high |
Almost invisible upper thread |
Tight and fragile stitches, |
|
|
Bobbin tension incorrectly adjusted |
Loops under the fabric, knots or |
Thread that breaks frequently, |
|
Imbalances cause visible defects and affect strength . If the tension is too loose, it forms loops, and if it is excessive, it causes puckers or breaks the yarn.
To learn how to use your sewing machine properly, take Verotex's sewing courses . In no time, you'll know everything about how to properly operate a sewing machine.
Recognizing tension problems
In addition to causing puckering, excessive tension also creates tight stitches and holes. The upper thread digs into the fabric, causing it to pucker.
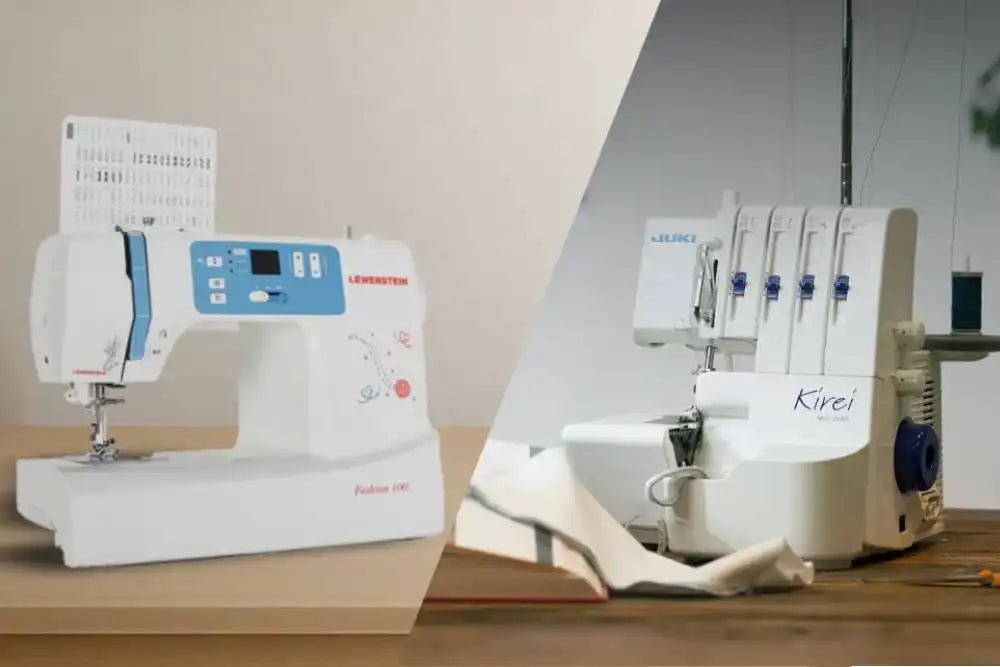
Low tension leaves loops under the fabric. At the same time, the bobbin thread stays straight, the stitches lack strength, and the seam gives way easily . It is also essential to understand the difference between a sewing machine and a serger , as each reacts differently to tension issues and requires specific adjustments.
Factors that influence tension
Several factors affect tension: thread type, fabric thickness, needle size. These parameters determine the necessary adjustments:
- Choose a thread that is suitable for the fabric to avoid puckering or excessive tension
- Adjust the tension according to the thickness of the fabric (thin fabric = low tension, thick fabric = high tension)
- Check the needle : A blunt or unsuitable needle will distort the balance between the thread and the fabric.
- Check the threading of the tension discs and the good condition of the bobbin
Specialty yarns and unusual fabrics require adjustments. Polyester is suitable for most fabrics , lightweight fabrics require less tension, and thicker materials require more tension.

Tension adjustments for perfect sewing
To achieve consistent stitches and flawless sewing, it's crucial to properly adjust your sewing machine tension. Proper adjustment of both the upper and bobbin threads ensures perfect thread balance. Here's how to adjust the tension to suit your needs, taking into account different fabric types and specific settings for each sewing situation.
Adjusting the upper thread tension
Use the dial to adjust the upper thread tension. Thread the thread correctly, then turn the dial to adjust. Then, test the stitching on a sample to check that the stitches are neat.
The numbers on the dial indicate the amount of tension being applied to the thread. A higher number indicates a tighter tension. Improper adjustment can lead to thread looping on the sewing machine , often caused by too little tension or improper thread insertion.
Adjusting the bobbin thread tension
Check the bobbin tension by hanging it by the thread. To adjust, turn the screw with a screwdriver. Proper balance prevents loops or uneven stitches.
To adjust the bobbin case, use a thin screwdriver and turn it slightly. Turn to the right to tighten, to the left to loosen. Incorrect adjustment can cause bobbin problems on the sewing machine , directly affecting the quality and strength of the stitches. Remember to test after each adjustment.
Optimal tension according to fabric types
Refer to the fabric thickness to choose your sewing machine tension. Thin fabrics require a lighter tension, while thicker fabrics require a firmer setting for even stitches.
|
Guide to recommended tension settings by fabric type and stitch type |
||
|
Fabric type |
Upper thread tension |
Recommended stitch type |
|
Lightweight fabrics (voile, silk) |
2 to 3 |
Straight stitch, narrow zigzag stitch |
|
Medium-weight fabrics (cotton, linen) |
3 to 4 |
Straight stitch, standard zigzag |
|
Thick fabrics (denim, fleece) |
5 to 6 |
Reinforced straight stitch, overlock |
|
Stretch fabrics (jersey, lycra) |
2 to 3 |
Elastic or zigzag stitch |
When sewing multiple layers, use a medium tension and test on a sample before finalizing the project. Also adjust the presser foot for even fabric feed.
Troubleshooting Common Voltage Problems
Incorrect sewing machine tension can lead to a range of problems: thread loops, uneven stitches, broken thread, and unwanted puckering. These problems, while common, often have causes that are easy to identify and correct. Find out how to spot these problems, understand their origins, and apply the correct settings to restore smooth, clean, and perfectly controlled sewing.
The thread that forms loops
Loops form under the fabric, the upper thread tension is too low and the bobbin thread is not held sufficiently.
To eliminate these loops, increase the upper thread tension with the dial. Also check that the thread is correctly threaded through all the machine guides.
Using a sewing machine will no longer hold any secrets for you once you have followed the complete sewing courses from Verotex .
Irregular or skipped stitches
Uneven or skipped stitches are often caused by unbalanced tension, a faulty needle, or improper threading. To avoid this problem:
- Check the needle : replace if blunt or damaged
- Repeat the entire threading to eliminate friction that could affect the thread tension.
- Gradually adjust the upper thread tension according to the fabric and stitch
- Test on a sample before sewing the final project to validate the settings
Experiment with different settings to achieve even stitches. Correct tension for the fabric prevents skipped stitches and unwanted puckering.
The thread that frequently breaks
Frequent thread breakage is the result of excessive tension, an unsuitable needle , or poor quality thread.
To avoid breakage , slightly reduce the tension. Also check the thread path, replace the needle and use a thread suitable for the fabric.
Unwanted puckering in fabric
Unintentional puckers occur when the upper or bobbin thread tension is too tight , pulling the fabric on itself.
To avoid this kind of problem and eliminate puckering, reduce the tension on your sewing machine . Also check that the presser foot is applying even pressure across the entire surface of the fabric.

Maintenance and servicing of voltage settings
Over time, sewing machine tension can become out of adjustment due to wear and tear or lack of maintenance. To ensure consistent performance and avoid recurring problems , regular cleaning of the tension system and periodic checking of the settings are essential.
Here's how to properly maintain tensioning components, spot signs of wear, and why professional maintenance can be crucial to preserving the quality of your seams.
Cleaning and maintenance of the tension system
Clean your sewing machine's tension discs regularly. Wipe the discs with a cloth soaked in a special cleaner as often as possible to remove dirt and residue that could affect thread tension .
Regular maintenance of voltage components
Before and after using your sewing machine, check the thread guides, bobbin case, and tension discs. Monthly cleaning prevents tension problems caused by dirt accumulating in the mechanical system. Remember that having your sewing machine serviced by a professional ensures optimal long-term operation.
Periodic checking of settings
Test the tension regularly. A stitch sample reveals imbalances between top and bobbin threads before starting a major project.
Signs of a wear-related tension problem
Tension that fluctuates for no apparent reason or persistent puckering despite adjustments indicates a wear problem . In this case, the tension discs or mechanism may need replacement or professional adjustment.
The importance of a professional interview
If problems persist despite cleaning and adjustments, consult a Verotex professional . A complete overhaul restores the tension system's accuracy for consistent, long-lasting stitches.
Call our technician if you notice the following problems:
- The machine exhibits unusual vibrations while sewing
- Voltage settings change on their own after use
- The thread breaks frequently despite the correct settings
- Seams remain uneven on all fabrics
Mastering sewing machine tension ensures clean, long-lasting seams . Adjust the dial to the fabric, check the balance between top and bobbin thread, and always test on a sample. Optimal tension prevents puckering or bunching, for flawless creations the first time.

Leave a comment
All comments are moderated before being published.
This site is protected by hCaptcha and the hCaptcha Privacy Policy and Terms of Service apply.