


Table of Contents:
JUKI MO-654D and MO-644D Serger: Master Threading and Unlock Its Full Potential
Thanks to their similar design, tips and tutorials for the Juki MO-654D also apply easily to the MO-644D.
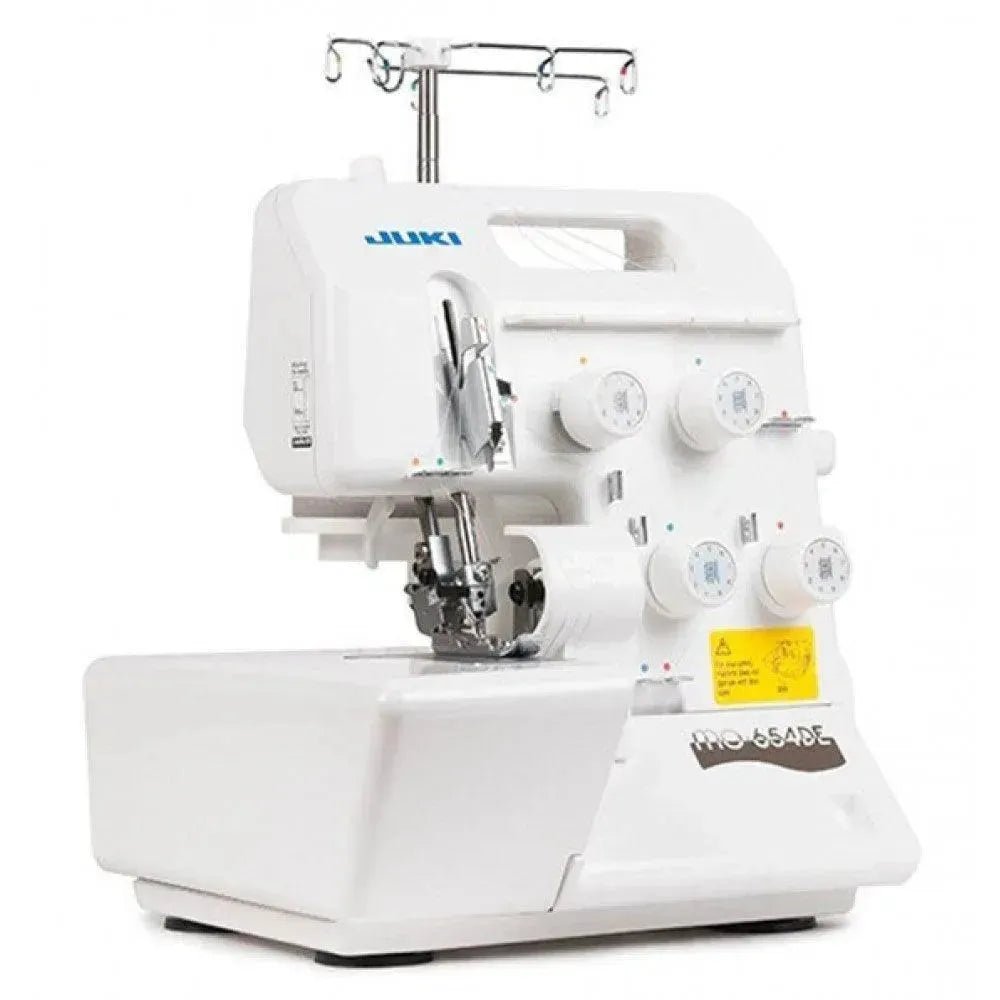
Dive into the world of sewing with our detailed guide on threading the JUKI MO-654D serger. This powerful and sturdy model is especially appreciated by demanding sewists for its efficiency and ease of use. Thanks to its color-coded threading system, automatic looper, built-in rolled hem, and lower looper threading system, it’s ideal for achieving professional finishes on all your projects.
This industrial-type serger offers precise settings and great stability. It suits both beginners and experienced sewists looking for a reliable and durable machine. You will find a French manual to guide you in using the machine.
Threading the JUKI MO-654D / MO-644D
Threading sergers can be tricky at first, but by following this step-by-step tutorial on threading the JUKI MO-654D, you’ll handle your machine like a pro!
We also offer an explanatory video for better threading guidance.
Step 1: First, make sure your serger is unplugged. Place your 4 spools on the spool holders. Don’t hesitate to use the spool colors marked on the machine the first time you use it to help you navigate with the color code.
Step 2: Once you have wound the threads through their respective thread guides (phase 1), take the blue thread for the upper looper and pass it through the tension discs in the following order:


Step 3: Next, take the red thread for the lower looper and pass it through the tension discs in the following order:
Make sure the lever is lowered before phases 8 and 9, then raise it for phase 10.


Step 4: Now take the yellow thread for the left sewing needle and pass it through the thread guide in the following order:
Don’t forget to pass the thread through the needle eye at phase 8 (yellow thread in the left needle).

Step 5: Now take the green thread for the right sewing needle and pass it through the thread guide in the following order:
Don’t forget to pass the thread through the needle eye at phase 9 (green thread in the right needle).

And there you go! You have threaded your serger and can now start sewing!

Here is the result you will get on the front and back of your seam:


What Are the Features of the JUKI MO-654D?
- Sewing speed: 1500 stitches/min
- Number of threads: 2/3/4 for overlock
- Stitch length: up to 4 mm
- Overlock width: 6 mm (left needle), 4 mm (right needle)
- Rolled hem width: 2 mm
- Length and width adjustment
- Adjustable differential feed for working with all fabrics
- LED lighting for optimal visual comfort
- Robust upper and lower knives for clean cutting
- Easy threading with automatic threader and color code
- Built-in rolled hem quick to activate
- Sturdy needle plate
- Universal presser foot for sewing all types of fabrics
This serger features a proven system that ensures flawless overlock stitches. Thanks to the adjustable presser foot pressure, it can adapt to the thickness of your fabrics, even the thinnest or densest.
What Are the Reviews of the JUKI MO-654D?
Users praise the reliability, durability, and performance of this machine. Its value for money is considered one of the best on the market. It is often cited as the best serger in its range, suitable for both beginner and advanced sewists. The quiet operation and precision of finishes are also highly appreciated features.
How to Adjust Thread Tension?
Thread tension adjustment is essential for a neat and strong result. With the MO-654D, each thread has its own easy-to-use adjustment dial. The system is clear, and tensions are individually adjustable, allowing precise control. This level of mastery is comparable to that found on a Juki flatbed sewing machine, known for its precision and reliability in professional sewing tasks. The provided manual effectively guides you to adjust the thread tension according to the fabric type used.
What Accessories Are Needed for the JUKI MO-654D?
The serger comes with a standard presser foot, a tweezers, a looper threader, a waste bin, and a protective cover. Additionally, you can invest in an 8-foot kit to expand decorative and technical sewing possibilities. These accessories allow you to change the presser foot depending on the task.
How to Make a Rolled Hem?
The built-in rolled hem lets you finish fabric edges finely for a beautiful decorative effect. Simply activate the dedicated lever to enable the function. Adjust the stitch length and presser foot pressure, lower your invisible stitch presser foot if needed, and let the machine create a perfect finish.
What Is the Difference Between JUKI Models?
The MO-654D stands out for its automatic looper, easy threading, and durability. It is more complete than models like the JUKI MO-50EN machine, while remaining accessible. It positions itself as an ideal serger for a sewist wanting to equip themselves with an industrial-type machine for home use. Thanks to its proven system and reinforced needle plate, it ensures durable sewing on all fabric types.
If you are looking for a versatile, high-performance, and reliable serger, the JUKI MO-654D is an excellent investment for sewing with peace of mind.

Leave a comment
This site is protected by hCaptcha and the hCaptcha Privacy Policy and Terms of Service apply.