


Table of Contents:
Tired of your creations tearing after the first wash or their edges fraying badly? Machine overlocking is the pros’ secret and revolutionizes your finishes with the serger. The result: speed, strength, and flawless aesthetics in a single pass.
This technique sews and finishes simultaneously, making it perfect for stretch or stable fabrics. Transform your sewing projects with professional finishes, ideal for t-shirts, leggings, or cotton dresses. Learn how to prevent fraying, handle fine or thick fabrics, and give your garments a boutique look—even as a beginner.
Machine overlocking: the key to professional finishes
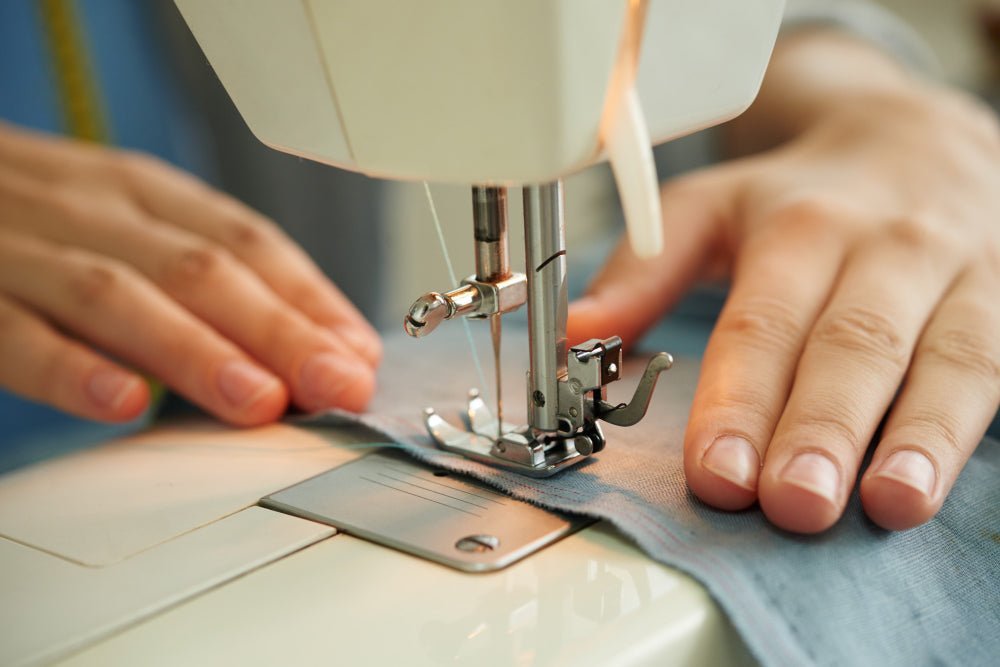
Machine overlocking turns your sewing projects into clean, durable finishes. In one pass, it sews fabrics together, trims excess edges, and encases them to prevent fraying. It outperforms hand overlocking in speed and precision, especially on stretch fabrics like jersey or spandex.
What is an overlock stitch and why is it essential?
The overlock stitch strengthens seam durability and garment longevity. Essential for woven fabrics (cotton, linen), it preserves the stretch of knits (jersey, lycra) without risk of breaking when stretched. A serger with 2 to 4 threads ensures superior quality, unlike regular machines that mimic overlock with a less reliable zigzag stitch.

The benefits of serger finishing
The serger combines speed, strength, and aesthetics. In under 15 minutes, it sews a jersey t-shirt with elastic seams. Thanks to its differential feed, it prevents puckering on soft fabrics.
It offers various stitches: 4-thread for thick materials and rolled hem for fine fabrics. For optimal results, choose a polyester thread for stretch fabrics or a fine thread for lightweight silks. Adjust tensions according to your machine’s guide for flawless finishes.
The main types of overlock stitches and their uses
The serger offers a variety of stitches suited to every project. By mastering these options, you gain precision and speed. Each stitch type meets specific needs: durability, discreet finishing, or decorative flair. Discover which to choose based on your fabrics and goals.
Overlock stitches: the most versatile
The 4-thread overlock is the ally of stretch fabrics. Thanks to its 2 needles and 2 loopers, it sews and overcasts in one pass. Ideal for jerseys, sweatshirts, or lycra, it ensures an elastic and durable seam. It’s the choice for sportswear or sweatshirts. For example, a pinned organic cotton t-shirt with this stitch stays comfortable and long-lasting.
The 3-thread overlock adjusts to wide or narrow depending on the needle removed. Used to overcast the edges of woven fabrics (cotton, viscose), it prevents fraying before assembly. Less strong for joining two pieces, it remains effective for light finishing. For thick fabrics, a wide 3-thread overlock prepares seam allowances before straight stitching.
The 2-thread overlock is suitable for very fine or delicate fabrics, like sheer curtains or linings. It uses one needle and one looper to save thread. Note: not all machines offer this option. This stitch is perfect for silk voile projects where discretion is key. However, its limited strength restricts it to seams that won’t be stressed.
Choose Verotex for your sergers and discover a level of precision and speed you’ve never experienced.
Decorative finishes: rolled hem and flatlock
The rolled hem enhances lightweight fabrics. Using 2 or 3 threads, it creates a fine, tight edge perfect for silk scarves or dress ruffles. On jerseys, a slight "lettuce edge" effect adds a graphic detail. For a clean result, adjust the thread tension. In fact, too loose tension widens the edge, while too tight tension can pucker the fabric.
The flatlock stitch combines functionality and aesthetics. After sewing, the edges lie flat to eliminate bulk. Essential for lingerie or sportswear, it offers absolute comfort. With contrasting threads, it becomes a decorative element. For example, dance leggings with flatlock seams in silver thread add a modern touch while following movements without irritating the skin.
Here are the different types of overlock stitches and their uses:
- The 4-thread overlock: For assembling and overcasting knit fabrics (jersey, sweatshirt).
- The 3-thread overlock: For overcasting the edges of woven fabrics (cotton, viscose).
- The rolled hem: For decorative hems on lightweight fabrics (silk, voile).
- The flatlock stitch: For flat and comfortable seams (sportswear, lingerie).
Each stitch has its role. By combining these options, you optimize every step of your creations. Test them on fabric scraps to adjust tensions and sew your projects without compromise. For example, for a cotton gauze project, a 3-thread overlock prevents fraying without weighing down the fabric.
With some experience, your overlock becomes an indispensable tool for precision and creativity. And if you are just starting sewing, these varied stitches will help you progress quickly while giving your projects a professional look.

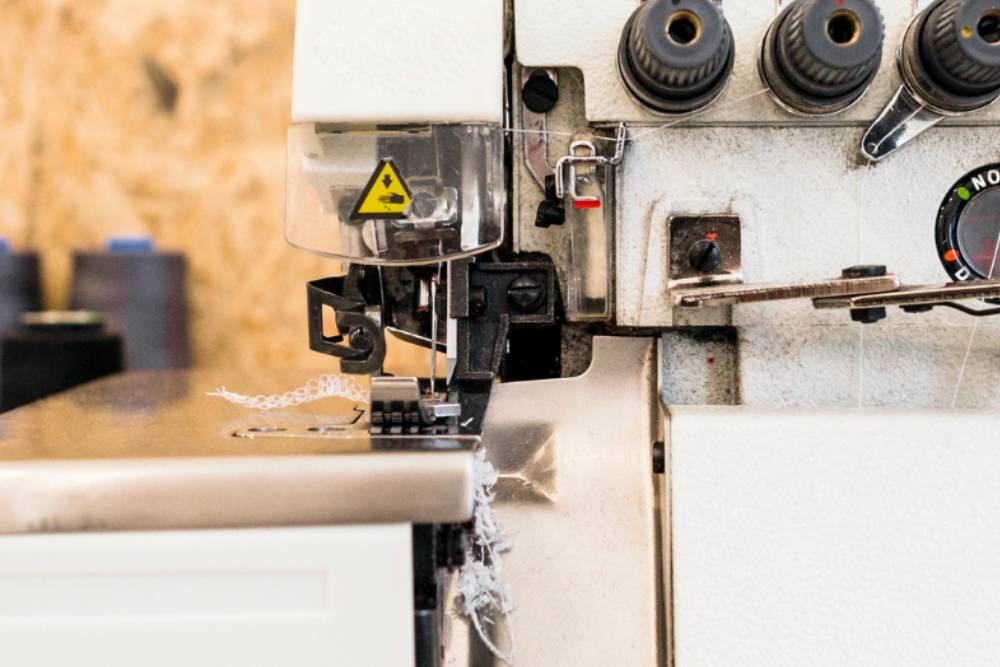
Mastering your overlock settings for a perfect stitch
To achieve flawless sewing finishes, properly setting your overlock machine is essential. Overlock stitches play a central role in the strength and appearance of seams. By selecting the right thread and needles, then adjusting tension, differential, and stitch length, you will transform your creations. Here are the essential settings to master your machine and get perfectly even stitches.
Choosing the right thread and needles
The choice of materials determines the quality of your overlock. Choose special overlock thread on cones: it is finer and economical. Use it in the needles, while the loopers benefit from soft foam thread for a gentle finish, ideal for lingerie or sportswear. This thread perfectly wraps edges without stiffness.
For needles, prioritize the ELx705 type, designed for overlock machines. Match them to the fabric: stretch/jersey needles for knits and microtex for fine fabrics. A worn needle causes skipped stitches. Therefore, it should be changed regularly to avoid issues.
The winning trio: tension, differential, and stitch length
The three key settings ensure a professional overlock. Balanced tension on the 4 threads (2 needles, 2 loopers) allows interlocking loops without overlap. Too loose or too tight tension spoils both appearance and strength.
The feed differential prevents puckering. Set to 1, it stabilizes stable fabrics. For jerseys, a differential of 1.3 to 1.5 compensates for stretch. Below 1, it gathers the fabric and is suitable for creating loose edges.
The stitch length (2.5 to 3.5 mm) and its width (adjusted via the knife) determine density and coverage. A short stitch (1 to 1.5 mm) is suitable for rolled edges, while a longer stitch works for standard seams.
|
Stitch type |
Main use |
Recommended basic setting |
|
4-thread overlock |
Stretch fabric assembly |
Tensions: 4/4/4/4 | Differential: 1.3-1.5 | Length: 2.5-3.5 mm |
|
Wide 3-thread overlock |
Finishing medium to heavy fabrics |
Tensions: 4/4/4 | Differential: N (1) | Length: 2.5-3.5 mm |
|
3-thread rolled hem |
Edges of very fine fabrics |
Tensions: 4/7/7 | Differential: N (1) or <1 | Length: 1-1.5 mm (presser foot toe removed) |
|
3-thread flatlock |
Flat decorative seams |
Tensions: e.g. 1/7/4 | Differential: N (1) | Length: 2.5-3.5 mm |
Note: These settings are guidelines. Always consult your machine’s manual and test on a scrap of your fabric before the final project.
Troubleshooting: common overlock problems and their solutions
In sewing, it’s common to encounter difficulties with overlock stitches: threads loosening, uneven seams, or overlock seams to unpick. These common problems may seem tricky, but there are always simple solutions to achieve a clean and strong finish. Here are essential troubleshooting tips to fix your mistakes and ensure perfect finishes with your overlocker.
My overlock stitch isn’t perfect: what should I do?
The seam puckers or stretches: This often happens with stretch fabrics like jersey. The differential feed adjusts the speed of the feed dogs. At 1.5, it compensates for the fabric’s elasticity. Always test on a scrap before making final adjustments.
Stitches are skipping: Replace the worn or unsuitable needle with a new one (Stretch type for elastic fabrics). Also check the threading, as a mispositioned thread in the looper can cause skipped stitches. A bent or improperly inserted needle is often the culprit.
The thread keeps breaking: Rethread the machine following the order of loopers then needles. Lower the tension of the affected thread by adjusting the corresponding dial. Choose a high-quality polyester thread or a specific overlock thread to reduce breakage. Also check the thread guides, as a caught thread causes breaks.
Loops are showing: Identify the responsible thread by its color. Slightly increase the lower looper tension if loops appear on the wrong side. Conversely, decrease the upper looper tension if loops are visible on the right side. Testing on a sample helps avoid mistakes on the final project.
With a Verotex overlocker, you eliminate these problems. Our sewing machines allow you to cut, stitch, and overlock in one pass, saving you valuable time while ensuring perfect quality.
Help, how do I unpick an overlock stitch?
Unpicking an overlock seems complex, but here is a proven method to avoid damage:
- Equip yourself with a seam ripper to cut threads without damaging the fabric. This tool is essential for precise work.
- Locate the needle threads on the right side (two parallel lines). Cut them every 3-4 cm with a seam ripper. This partial cutting prevents the thread from getting stuck.
- Turn the fabric inside out. Gently pull the looper threads on the wrong side. They release effortlessly, especially if the fabric is held flat.
- Remove remaining needle debris with tweezers. This prevents unsightly threads after repair. For fragile fabrics, work over a padded table to avoid snags.
This technique works on all fabrics, even the most delicate. It allows you to fix a failed seam without damaging the fabric. There’s no frustration, just a clean result in a few minutes. Keep a sample of your previous settings to save time on future fixes.

Which serger to choose based on the desired stitches?
Choosing the right serger directly depends on the overlock stitches you want to achieve. Between 3, 4, or 5-thread models, each machine offers possibilities suited to different projects: simple finishes, stretch seams, or strong assemblies. To avoid mistakes and find the ideal equipment, it is essential to understand the specifics of each configuration. Here’s how to select the serger best suited to your needs.
A 3, 4, or 5-thread serger: making the right choice for your projects
The number of threads determines the available stitches and versatility. A 3/4-thread serger suits 80% of projects, while a 5-thread adds the coverstitch, ideal for t-shirt hems.
The 3/4-thread serger is economical and allows 4-thread overlock (elastic assembly on jersey), 3-thread for thin or thick fabric edges, and 2/3-thread rolled hems for discreet hems on silk or muslin. It is sufficient for 90% of occasional sewists.
The 5-thread (combined) serger is reserved for enthusiasts. In addition to classic stitches, it performs the coverstitch: two straight lines on the right side, an overlock on the wrong side. Ideal for sportswear or stretch garments. However, reconfiguring the machine to switch from overlock to coverstitch reduces the time saved. The high-end Juki models justify their price with professional finishes.
Here’s how to choose your serger according to your needs:
- To start and sew everything: A 4-thread serger is perfect and versatile.
- For knitwear: A 4-thread serger is essential. A 5-thread combo is useful for perfect hems.
- For very fine fabrics and lingerie: A 4-thread serger with a 2-thread option and rolled hem setting is recommended.
Before buying, assess the percentage of your projects requiring coverstitching. If less than 20%, a 4-thread serger is enough. Choose a 5-thread combo only if you regularly make t-shirt hems or stretch garments.
Your next steps toward flawless serging
You now have all the keys to master machine serging. Imagine flawless finishes, strong seams, and unmatched time savings. The serger turns every sewing project into an accessible success, without technical jargon.
The secret is practice. Test stitches on fabric scraps: one adjustment can change everything. Don’t panic if the first try isn’t perfect, because every serger has its own personality and it’s by experimenting that you get to know it. To go further, using a Juki sewing machine can also offer precision and reliability, ideal to support your most ambitious projects.
The checklist for a successful serge
For flawless serger stitches, you need to:
- Use suitable needles: stretch for elastic fabrics, microtex for fine fabrics.
- Choose a quality thread, special for sergers, to avoid breakage.
- Always test your settings (tension, differential) on a fabric scrap.
- Clean and oil the machine after each session to ensure its proper functioning.
- Experiment: every stitch from your serger opens up creative possibilities.
Ready to elevate your projects? Your next creation deserves those perfect finishes that only machine serging can provide.
The serger machine turns your perfect finishes into child's play. To succeed, practice without fear, test the settings on fabric scraps, and follow our checklist: suitable needles, quality thread, regular cleaning. And for reliable, trusted equipment, the models offered by Juki France are a benchmark for demanding sewists.
Leave a comment
This site is protected by hCaptcha and the hCaptcha Privacy Policy and Terms of Service apply.