


table of contents:
The invisible zipper is an essential finishing touch for achieving a garment with clean and discreet seams . It is ideal for dresses, skirts and trousers, as it blends perfectly into the seam without being visible.
In this article, we will discover how to install an invisible zipper with a shape or with a belt.
How to install an invisible zipper with a shape?
The shaping is a piece of fabric used to reinforce and structure the inside of a garment , particularly around the neckline or waist. Installing an invisible zipper on a garment with shaping requires precision to ensure a harmonious finish.
Prepare the garment before installing the zipper?


Before installing the zipper, you must prepare the garment:
- Join the bottom of the shape right sides together with the top of the side of the garment.
- Leave about 5 cm before the end of the seam to insert the zipper.
- Trace the seam allowance marks to correctly position the zipper.
- Make sure the top marks match the pattern values , and place the bottom ones 3 cm above the end of the zipper .
Secure the first side of the zipper
 .
. 
Once the markers have been drawn:
- Join one side of the zipper right sides together with the edge of the fabric.
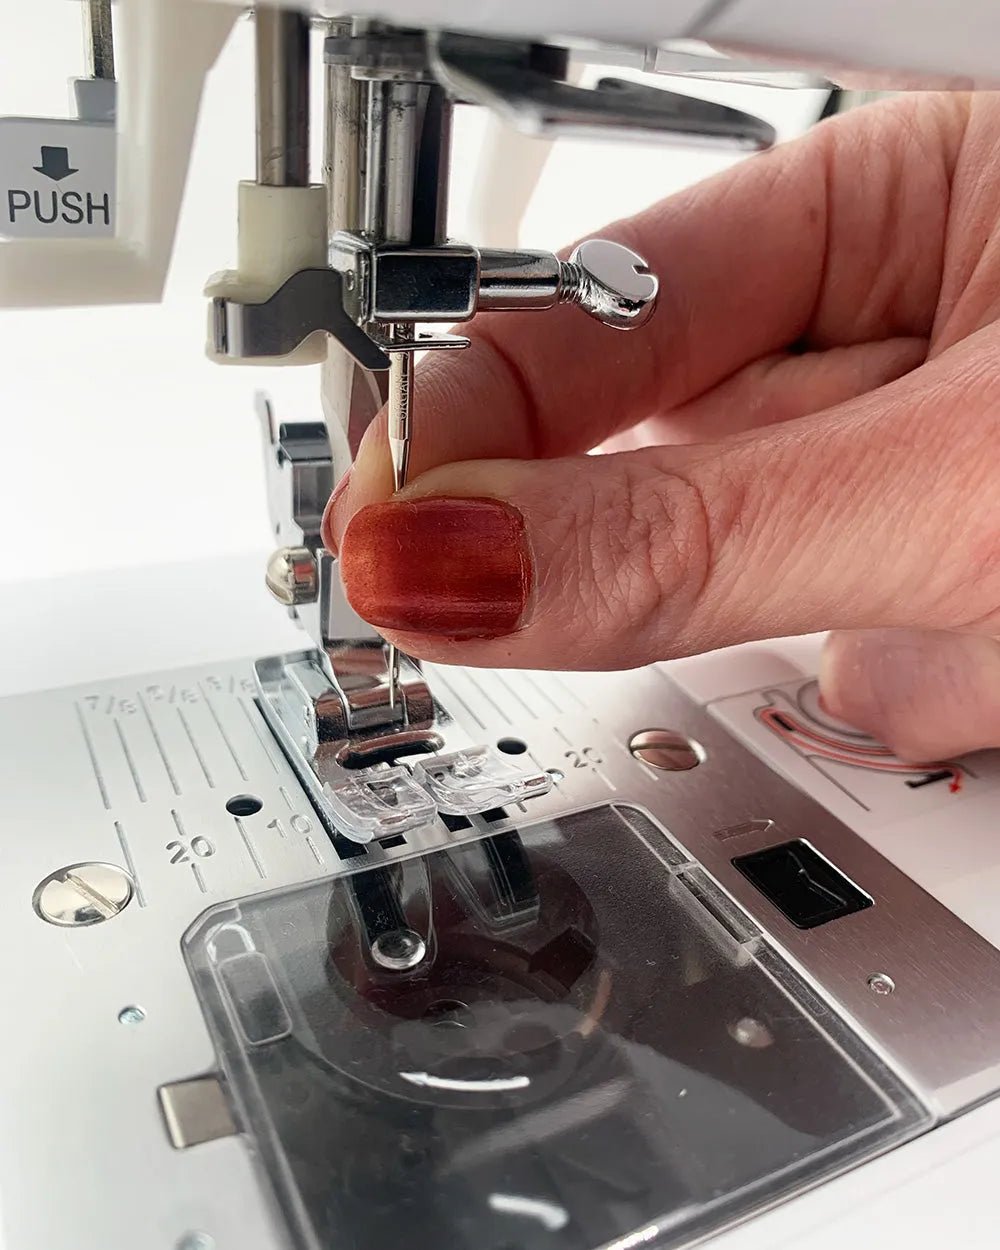
- Position the stitches of the pull tab in the groove of the presser foot , keeping them open with your fingers.
- Sew as close to the stitches as possible so that the zipper remains invisible once closed.
- Make sure the zipper is sewn 1 cm lower than the end of the first seam .
Ensure perfect alignment


To avoid misalignment between the two sides of the zipper:
- Close the zipper and align it with the folded seam.
- Mark the zipper and fabric at the same height to ensure perfect alignment on both sides.
- Join the second side of the zipper right sides together with the garment.
finish sewing the zipper with the shaper


Once the zipper is in place:
- Trim 5 mm from the edge of the shape to help the fold form.
- Join the shape, the zipper and the seam allowance right sides together .
- Sew 5 mm from the stitches to prevent the shaping from blocking the closure.
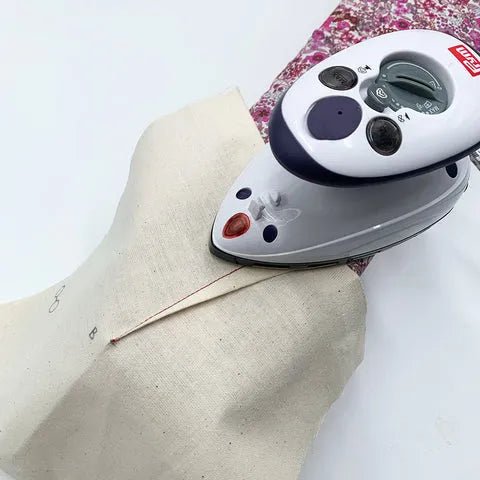
- Fold the seam allowance (including the pull tab) inward and finish the unfinished seam.
- Cut off the excess fabric at the corners and turn everything inside out.
How to install an invisible zipper with a belt?
When using an invisible zipper with a belt, the method is slightly different. Make sure the zipper stays aligned with the belt for a flawless finish.
Prepare the seam for a zipper with belt

Before installing the zipper:
- Mark the seams as for shaping.
- Join the two sides of the garment right sides together , removing the zipper allowance.
- Join the bottom of the right side of the waistband right sides together with the top of the sides of the garment .
- Join the top of the right side of the belt right side to the top of the wrong side of the belt right side, leaving 5 cm before the end of the seam .
Sew the zipper onto the garment with the belt


- Join one side of the zipper right sides together with the garment.
- Position the plastic end just below the seam allowance .
- Close the zipper and position it on the folded seam.
- Make two marks on the zipper and fabric : one at the bottom of the waistband and another at a location chosen for alignment.
Finish sewing the zipper with the belt

- Recover 5 mm from the edge of the inner belt to avoid excess thickness.
- Join the inner belt and the zipper right sides together .
- Sew 5mm from the stitches for a clean finish.
- Fold the seam allowance (including the pull tab) inward , then finish the unfinished seam.
- Trim the excess fabric at the corner and turn everything inside out for a clean finish.
What are some tips for a successful invisible zipper?
To achieve a flawless result, here are some essential tips:
- Sew as close to the stitches as possible : place the stitches of the pull tab in the notch of the presser foot and use your fingers to flatten it well.
- Baste before sewing with the machine : this makes it easier to hold the zipper and prevents it from slipping during sewing.
- Check the alignment of the seams : the sides of the zipper must meet the seams of the garment for a harmonious appearance.
Conclusion :
Installing an invisible zipper requires precision and patience , but the result is worth it.
To remember:
- Carefully prepare the garment by drawing precise marks.
- Use the correct presser foot to sew as close as possible to the stitches.
- Align both sides of the zipper perfectly for a symmetrical look.
- Trim excess fabric from the corners to avoid excess thickness.
- Finish the seam neatly with the shaper or waistband for a professional result.
With these techniques, your invisible closures will be perfectly integrated and undetectable once the garment is finished.
Leave a comment
All comments are moderated before being published.
This site is protected by hCaptcha and the hCaptcha Privacy Policy and Terms of Service apply.