Table of contents:
Do you have a sewing machine but don't know how to use it? Technical manuals seem incomprehensible, and online tutorials too discouraging? Don't let this wonderful device gather dust and discover here a simple sewing machine tutorial that will teach you the basics of using the sewing machine.
From magical threading to your first stitches, including basic settings and tips to avoid thread breakage, you will master the basics in less time than it takes to say it.
Discovering your sewing machine: the beginner’s guide to components
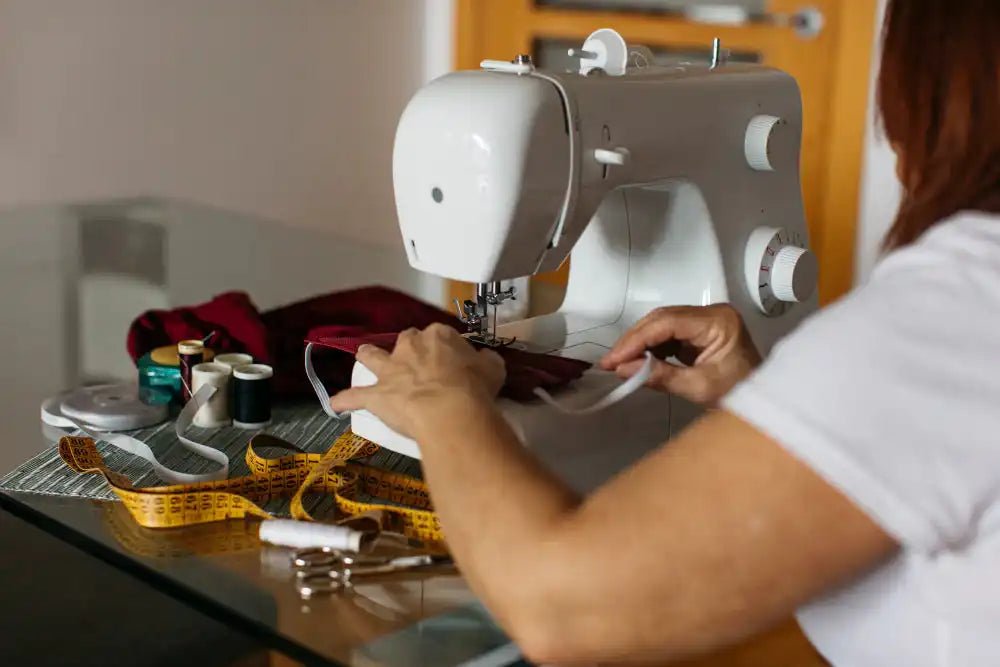
A sewing machine may seem intimidating at first, but its basic components are easy to identify. Understanding their role will allow you to sew with confidence, even if it’s your first time:
- The handwheel: The large side wheel to maneuver the needle (turn towards you).
- The presser foot: A metal or plastic clamp that holds the fabric in place.
- The spool pin: The place for the upper thread spool, often on top or at the back of the machine.
- The stitch selector: The button or lever to choose the stitch type.
- The needle plate: The metal plate under the needle, marked with guides to direct the fabric.
- The reverse lever: To sew backward and reinforce seams.
What is each part for? The role of each piece
Each component plays a key role in the success of your sewing. Here is their practical use:
- The presser foot holds the fabric firmly. Without it, the fabric might slip. Proper pressure prevents puckering on fine fabrics or improves feeding of thick fabrics.
- The handwheel allows manual positioning of the needle. In case of a jam, check for lint in the bobbin case or lubricate the mechanism.
- The stitch selector adjusts the needle movement to create straight, zigzag, or decorative stitches. The reverse lever reinforces seams by sewing backward.
- The needle plate guides the fabric thanks to its markings. A properly installed bobbin ensures strong stitching by interlocking the upper and lower threads.
Knowing these elements avoids common mistakes. Moreover, a well-maintained machine, with a smooth handwheel and clean components, guarantees lasting results.

Step-by-step threading: the essential preparation before sewing
Before you start sewing, mastering the threading of your machine is an essential step. This sewing machine tutorial guides you step by step to prepare and install the bobbin, correctly thread the upper thread, and bring up the lower thread. Careful preparation ensures even stitches and prevents jams, ideal for beginners as well as experienced sewers.
Step 1: Prepare and install the bobbin (the lower thread)
The bobbin contains the lower thread that interlocks with the upper thread. There are two types of bobbins: metal bobbins (for mechanical machines) and plastic bobbins (modern models).
To fill them, place the spool on the spool pin, then pass the thread through the dedicated guides. Then insert the thread into the bobbin hole (if present) and activate the winder. Fill without exceeding 80% capacity to avoid uneven winding, as explained in this beginner sewing machine tutorial.
For installing the bobbin, you have two options: on the side (the metal case) or under the presser foot (modern models). For side bobbins, check the direction of rotation (usually counterclockwise) and insert the thread into the slot of the case.
You should feel a click confirming the lock when the bobbin is inserted. For front bobbins, place it in its housing following the visual marks, then pass the thread through the guide and close the cover after gently pulling it backward.
Step 2: Threading the upper thread following the numbered guide
Threading the upper thread follows a standard path where you simply need to raise the presser foot and needle to the highest position.
Pass the thread through the thread guide and down into the slot. Then bring it back up towards the thread lifter lever, then back down to the needle. The numbered guides on the machine make this step easier. For needles without an automatic threader, pass the thread from front to back or sideways depending on the model.
Use a manual accessory by sliding the thread into the notch of the needle threader. Push it against the needle and catch the thread at the back after passing through, as explained in this beginner sewing machine tutorial.
Modern machines often offer an automatic system. Activate it by pressing the dedicated button, position the thread in the needle threader hooks, then slowly release the accessory. This helps avoid common beginner mistakes, such as the thread getting stuck or mispositioned. To master this essential step perfectly, also follow this detailed sewing machine tutorial that illustrates each movement.
Step 3: Pulling up the bobbin thread, the final step
Once the threads are in place, turn the handwheel towards you so that the needle goes down and up. The upper thread will "catch" the lower thread, creating a loop. Gently grasp this loop with tweezers to pull the bobbin thread out.
Pass both threads (upper and lower) under the presser foot and pull them toward the back of the machine, as explained in this beginner sewing machine tutorial to avoid tangling at startup.
For beginners, a common mistake is neglecting the bobbin rotation direction. Thread unwinding the wrong way causes irregular stitches. So always check the instructions provided with the machine. Finally, remember that improperly positioned threads behind the presser foot cause sewing defects. To better visualize each step, also follow this comprehensive sewing machine tutorial illustrating threading and thread preparation.
If you don’t have a sewing machine, you can rent one from Verotex.
The fundamental settings for your first seams
|
Stitch name |
Common symbol |
Main use |
|
Straight stitch |
Continuous line |
Joining two fabrics, topstitching |
|
Zigzag stitch |
Broken line |
Overcasting edges, sewing stretch fabrics |
|
Backstitch |
U-shaped arrow |
Securing the start/end of a seam |
|
Buttonhole |
Rectangle with slit |
Creating buttonholes |
Choosing the right stitch: the essentials for beginners
The two essential stitches are the straight stitch (90% of seams) and the zigzag stitch (for finishes and stretch fabrics). Locate the stitch selector on your machine and practice switching between them by following this sewing machine tutorial to easily master the basic settings.
The straight stitch is used to join fabrics like cotton or linen, while the zigzag is ideal for jerseys or anti-fraying finishes. The backstitch secures seams without unpicking. To discover variants like the triple straight stitch or stretch stitch and learn how to use them correctly, refer to a detailed beginner-friendly sewing machine tutorial.
Adjusting the stitch length and width
The stitch length (set to 2.5 mm by default) determines the strength of the seam. Increase it for gathers or basting stitches. A short length (1-1.5 mm) prevents distortions on darts, as explained in this sewing machine tutorial to fully understand the essential settings.
The stitch width (specific to zigzag) varies depending on the fabric: a tight zigzag (width 2-3) is suitable for thick fabrics like denim, and a wide one (5-6) works for fine voile or jerseys. Always test on a sample before sewing your project.

Understanding thread tension: the key to perfect stitches
Balanced tension between the upper thread and the bobbin ensures neat stitches. If loops appear on the wrong side, tighten the upper thread (increase the number). If they are visible on the right side, loosen the tension. Most machines use a standard setting (4-5). To fully understand these adjustments and avoid common mistakes, follow this sewing machine tutorial designed for beginners.
Adjust according to the fabric: reduce for delicate ones or increase for thick ones. Clean the machine regularly, as a poorly threaded thread or incorrectly inserted bobbin causes loops. A detailed sewing machine tutorial will also help you avoid these frequent errors and achieve perfect seams.
Practical tips to avoid common mistakes
Check that the needle matches the fabric (universal for cotton, stretch for jersey) and thread the machine correctly to avoid unbalanced tensions. If the seam pulls or distorts, release the tension or use an elastic stitch. For thick fabrics, use a suitable presser foot. Consult the manual for settings according to the fabric.
Let's go! From the straight line to your first concrete project
Are you new to sewing and want to move from theory to practice? This sewing machine tutorial guides you to master straight line sewing, a key step to learning how to manage the pedal and fabric guidance. Then, start a simple and motivating project: make your first makeup remover pad, perfect for gaining confidence and progressing quickly.
The straight line exercise: mastering the pedal and guiding
Start with the straight line, a simple but essential exercise. Take a piece of cotton fabric, thread your machine, and practice the backstitch. Without it, your seam may come undone, especially on thin fabrics. To get off to a good start, follow this sewing machine tutorial that explains step-by-step how to master the first straight lines.
Press the pedal gently to control the speed, then sew along the edge of the presser foot. Focus on keeping the distance between the thread and the fabric edge consistent and repeat the exercise for straight lines and tight stitches.
For beginners, two types of stitches are enough: the straight stitch (strong seams) and the zigzag stitch (hems or stretch fabrics). The straight stitch, set to 2.5 mm, is the foundation. The zigzag secures frayed edges. To deepen these settings and avoid common mistakes, also check out a comprehensive sewing machine tutorial tailored for beginners.
You must master these two stitches to be independent when making simple projects. When you sew thick fabrics, still be careful because you need to reduce the presser foot pressure to facilitate feeding the two layers.
Easy project idea: sew your first makeup remover wipe
Here is the material needed to make a wipe:
- A 12x12 cm square of terry cloth or microfiber fabric
- A 12x12 cm square of cotton fabric (cotton broadcloth)
- Matching thread
- Scissors and pins
Layer the fabrics right sides together and pin the edges. Then sew all around 1 cm from the edge leaving a 4 cm opening. Trim the corners by cutting diagonally 1-2 mm from the thread to avoid lumps after turning.
Use fine scissors for more precision. Here’s a pro tip: on thick fabrics, make an extra backstitch before cutting to prevent seams from fraying. To properly perform these steps, follow this sewing machine tutorial that explains the essential moves for beginners.
Turn the wipe inside out using a non-pointed object (hairpin or empty ballpoint pen) to avoid piercing the fabric. Press carefully, then close the opening with a topstitch to reinforce the seams and improve the appearance. The topstitch is important because it prevents the edges from fraying and gives a professional finish. Beginners can use an open-toe presser foot to better see their work.
This quick project uses fundamental techniques including assembly, backstitch, and finishing. A homemade wipe is eco-friendly and economical. Did you know that 80% of beginners succeed at this project on their first try? To go further, try variations: add a small wooden ring to hang it or use printed fabrics to personalize your wipes.
Sewing machine problems? Discover the solutions that change everything
Starting with the machine often feels like a series of challenges. But rest assured, because 89% of problems encountered by beginners are solved in 5 simple steps. Did you know that 70% of jams come from incorrect threading? This practical guide breaks down the most common mistakes with tested and validated solutions, illustrated by easy-to-follow visual explanations.
Why does my thread break or form loops?
The thread breaking is often due to too high upper tension or a dull needle. To avoid this, check that the thread follows the path indicated in the manual. A sewing machine tutorial can show you step by step how to correctly adjust the tension and choose the right needle.
Loops under the fabric appear in 95% of cases due to incorrect threading of the top thread. If this is the case, completely remove the thread and re-thread with the presser foot raised. To deepen these settings and avoid common mistakes, also follow a second detailed sewing machine tutorial that explains threading and thread choice according to the fabric.
Skipped stitches or a broken needle: what to do?
Skipped stitches usually indicate a worn needle. You won’t have this problem if you change the needle every 8 to 10 hours of sewing. Also, a broken needle indicates a sudden movement while guiding the fabric or an unsuitable choice for the thickness. You can avoid this by letting the machine feed the fabric naturally. Here is the essential checklist:
- Re-thread the machine completely (top thread and bobbin): 80% of problems disappear
- Replace the needle with a new one suited to the fabric
- Clean the bobbin compartment with a soft brush
- Check the thread quality and its suitability for the fabric
- Make sure the bobbin is inserted the right way
The sewing machine becomes a valuable ally once you master the basics. By following these steps, you will avoid 90% of jams. Remember: every problem has a simple solution. Test these tips on a fabric scrap before your final projects. With this method, even beginners turn their ideas into concrete creations without frustration.

Maintaining your machine to make it last longer
To ensure the longevity and performance of your device, proper maintenance is essential. In this sewing machine tutorial, discover simple steps to regularly clean your machine and prevent dust accumulation. You will also learn when and how to properly oil its mechanisms to ensure smooth and lasting operation. Practical advice for sewing with peace of mind while preserving your equipment in the long term.
Basic cleaning: a simple and essential step
A poorly maintained sewing machine accumulates dust and fibers, which causes jams or irregular stitches. Always unplug the device before starting and, using a soft brush or a fine paintbrush, access sensitive areas without damaging them.
For optimal operation of your sewing machine, perform a:
- Daily cleaning: Brush accessible areas after each use with a soft brush to prevent debris buildup.
- Deep cleaning: Remove the needle plate every 5 to 10 hours of sewing. A dry cloth removes residues in the bobbin compartment.
Avoid compressed air cans, as their strong blast pushes dirt further into the mechanisms. A brush or cotton swab is enough for corners.
When and how to oil your sewing machine?
Self-lubricating machines require no oil addition. For others, use a special white sewing oil that is fluid, colorless, and protects moving parts.
Here are the steps to properly oil the machine:
- Check the oiling points indicated in the manual.
- Apply a drop at each sensitive point (thread guides, moving shafts).
- Wipe off the excess with a dry cloth to avoid attracting dirt.
Excess oil attracts dust and clogs the mechanism. For beginners, an oiling session every 20 to 30 hours of sewing is ideal. Check your machine’s specifications, especially if you sew thick fabrics like faux leather, which generate more friction.
Learning to sew alone: our tips to stay motivated
Do you think sewing alone is difficult? Rest assured, with the right methods, it’s entirely possible. This sewing machine tutorial gives you practical advice to learn independently, stay motivated, and progress step by step. Thanks to a few simple tips, you will avoid discouragement and enjoy seeing your projects advance, even without guidance.
Yes, you can learn to sew on your own!
Online sewing machine tutorials show that 80% of beginners succeed in their first projects. Your first stitches won’t be perfect, but that’s a normal step. Every mistake is a step toward mastery. Imagine yourself making a cushion in 30 minutes… It’s within your reach!
Our tips to avoid discouragement and make progress
No machine in sight? Start with hand projects. Making a simple cushion or a pillowcase takes 1 hour. Keep your materials within reach: 70% of beginners give up if the materials are inaccessible.
For your first sewing projects:
- Prefer cotton or linen: these fabrics do not slip.
- Test the settings on a sample before sewing the final project.
- Use video sewing machine tutorials to visualize the steps
And if you hesitate, remember: even pros started with uneven stitches. Your sewing machine will soon become your ally. The best way to learn is to take a sewing class with professionals. Sign up for Verotex's sewing machine initiation courses to become a sewing expert.















Leave a comment
All comments are moderated before being published.
This site is protected by hCaptcha and the hCaptcha Privacy Policy and Terms of Service apply.