

















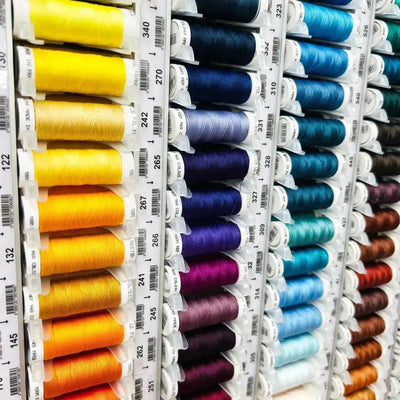
 Thread matching your fabrics - LefilFrançais - 100 m
How to sew a binding with a coverstitch machine?
Learning how to sew a binding with a coverstitch machine allows you to achieve stretchy, neat, and comfortable finishes, ideal for knitwear such as jersey or sweatshirts. This article guides you step by step to understand when to use the coverstitch machine, which settings to choose, how to position the binding correctly, and how to avoid common mistakes like puckering or uneven seams. You will also discover the differences between binding, stay tape, and facing, as well as sewing tips to achieve professional finishes, even if you are new to using a coverstitch machine.
Level
Confirmé
Equipment
2,60 €
1 references, minimum purchase amount, and current price
This is a common question whenever you want to achieve neat, stretchy and comfortable finishes on knit garments. The coverstitch machine is particularly valued for this type of work, but sewing binding with a coverstitch machine may seem difficult at first: wavy binding, uneven stitching or difficulty positioning it correctly.
If you are looking for how to sew binding with a coverstitch machine neatly and with control, you have come to the right place. This technique is ideal for jersey, sweatshirt fabric or any stretchy knit, as it produces a soft and durable coverstitch binding finish. Whether you want to apply binding with a coverstitch machine to a neckline or armhole, or create a coverstitch clean finish, it is essential to understand the correct settings and techniques.
In this article, you will discover how to sew binding with a coverstitch machine step by step: the necessary equipment, coverstitch settings for binding, a detailed method, common mistakes and solutions. The aim is to help you make full use of your coverstitch machine to achieve neat, even and professional finishes, even if you are just starting out with this machine.
Why sew binding with a coverstitch machine rather than a sewing machine?
Before getting into the technique, it is important to understand why the coverstitch machine is particularly well suited to applying binding. It produces a stretchy finish, ideal for knit garments.

The advantages of binding with a coverstitch machine
The coverstitch machine offers tangible benefits when you want to sew binding with a coverstitch machine onto jersey or sweatshirt fabric.
- Stretchy seam that moves with you
- Soft and comfortable finish
- Professional look on the right side
- Ideal for everyday and sportswear
This flexibility is difficult to achieve with a conventional sewing machine.
When is a coverstitch machine the best option?
The coverstitch machine is particularly recommended for:
- T-shirt necklines
- sleeveless armholes
- knit binding strips
In these cases, attaching binding with a coverstitch machine ensures a durable, comfortable-to-wear finish.

What materials and settings are needed to sew binding on a coverstitch machine?
Success depends largely on preparation. Suitable materials and the right settings make sewing much easier.
Essential materials for attaching binding with a coverstitch machine
To sew binding on a coverstitch machine, it is recommended to use:
- A properly adjusted coverstitch machine
- Stretch binding or binding cut from jersey
- Foam or textured thread for the loopers
- Needles suitable for knit fabrics
Non-stretch binding should be avoided on stretch fabrics.
Essential coverstitch machine settings for binding
The settings directly affect the final result:
- Balanced thread tension
- Slightly adjusted differential feed
- Medium stitch length
Which binding feet can be used with a coverstitch machine?
A coverstitch machine can sew binding without a specific accessory, but certain feet can make the work easier.
The binding foot for a coverstitch machine: what is it used for?
The binding foot is designed to guide folded binding while sewing. It ensures a consistent width and limits shifting, especially on long finishes.
It is particularly useful for:
- necklines
- long seams
- visible finishes
- repetitive projects
Is a binding foot absolutely necessary for sewing binding on a coverstitch machine?
No, a binding foot is not essential. The standard foot is already sufficient to sew binding on a coverstitch machine accurately, especially for short lengths.
How do you sew binding on a coverstitch machine step by step?
This section explains the method step by step to achieve a neat, even result.
Prepare and position the binding correctly
Preparation is essential. The binding should be lightly pressed and positioned without stretching it.
Sew binding on a coverstitch machine without rippling
The seam should be sewn slowly and evenly, without pulling on the binding or the fabric. Let the machine feed the fabric.
| Step | Action | Key tip |
|---|---|---|
| Preparation | Press the binding | Stability |
| Sewing | Move forward without pulling | Consistency |
| Checking | Check the wrong side | Comfort |

Binding on a coverstitch machine: common mistakes and solutions
Even with a good method, certain mistakes are common when you are just starting out.
Why does my binding ripple on a coverstitch machine?
Bias tape that ripples is often caused by:
- bias tape stretched too much
- differential feed incorrectly adjusted
- excessive tension
Correcting these points results in a neater coverstitch bias tape finish.
Why is the stitching uneven?
Uneven stitching is often caused by a speed that is too high or insufficient guidance of the bias tape. Slowing down immediately improves precision.
Bias tape, binding, or facing: which should you choose?
Not all finishes are equally suitable for every project. It is useful to compare the options.
Differences between bias tape and binding
Bias tape covers the edge, while binding reinforces the inside of the garment. Both techniques are compatible with a coverstitch machine.
When to choose a coverstitch machine for finishing
A coverstitch machine is ideal when stretch and comfort are priorities, especially for garments worn directly against the skin.
Bonus: How to sew bias tape with a coverstitch machine?
This section brings together practical advice based on hands-on experience.
Tips from dressmakers for a perfect finish
- Always test on a scrap
- Adjust the bias tape width
- Press lightly after sewing
These habits significantly improve the result.
Adapt the technique according to the fabric (jersey, sweatshirt fabric, knit fabric)
Each knit fabric reacts differently. Fine jersey requires a gentler approach, whereas sweatshirt fabric tolerates more support.
Conclusion: successfully attaching bias tape with a coverstitch machine
Knowing how to sew bias tape with a coverstitch machine makes it possible to achieve stretchy, comfortable, and professional finishes. By choosing the right equipment, adjusting the settings, and using a gradual approach, the coverstitch machine becomes a real asset for knitwear. With a little practice, this technique becomes quick, reliable, and particularly rewarding.
FAQ: How to sew bias tape with a coverstitch machine?
Can you sew bias tape with a coverstitch machine without a special presser foot?
Yes, the standard presser foot is sufficient for most projects.
Which bias tape should you use for jersey?
Stretch bias tape or bias tape cut from jersey is recommended.
Does a coverstitch machine replace a sewing machine for attaching bias tape?
No, each machine has its uses depending on the fabric and the finish.
Can you attach bias tape flat with a coverstitch machine?
Yes, provided it is positioned correctly and the settings are properly adjusted.
What you need
Prices and stock come from the catalog and update automatically. Each button takes you to the product page, where you can choose the quantity.
Thread matching your fabrics - LefilFrançais - 100 m
It doesn’t work like in the photo?
Send us a photo of your attempt on WhatsApp. Our experts can recognize most mistakes at a glance and tell you what to adjust.
- Same-day response, Tuesday to Saturday
- We’ll show it to you in person at the workshop
- No question is silly; we all started somewhere
What difference does learning this technique with us make?
See it in personSeeing something done once is worth ten tutorials read. The workshop is open from Tuesday to Saturday.
On your own machineBring it with you, even if you didn't buy it here.
The right foot, tried beforehandWe’ll check that it fits your model before you buy it.


