
 Sewing pattern – Suzane Shorts
5,00 €
 New arrivals
 Bi-Stretch
 Binky
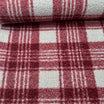 Bouclé fabric
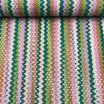 Broderie anglaise
 Calico
 Canvas
Cotton
 Swiss Cotton
 Liberty Style
Crepe
 Lace
 Double Gauze
 Sponge
 Faux fur
 Flannel
 French Terry
 Denim
 Jersey
Cotton Jersey
 Viscose Jersey
 Jersey knit fabric
 Jogging
 linen
 Quilted
 Microfiber
 Batting
 Houndstooth
 Cotton Piqué
 Fleece
 Polyester
 Poplin
 Satin
 Cotton Satin
 Sweat
 Tartan
Tetra
Lining fabrics
 Tulle
 Tweed
 Velvet
 Gingham
 Viscose
How to take accurate measurements for a custom garment?
Before creating a pattern, it is essential to take accurate measurements to ensure a perfect fit. Waist, hips, height, inseam… each measurement must be taken carefully to avoid errors and guarantee a flawless drape.
In this article, discover the detailed steps to take measurements correctly, mistakes to avoid, and tips for achieving a perfectly fitted garment .
Need a precise guide to successfully take your measurements? Read the full article!
Before assembling a garment, it is essential to take accurate measurements to ensure a perfect fit. Whether for a custom pattern or to adapt an existing model, well-taken measurements ensure a comfortable and flattering garment.
In this article, discover how to take measurements correctly, which measurements are essential, and how to avoid common mistakes.
Taking accurate measurements allows you to:
Whether you are making a garment for yourself, a client, or an industrial prototype, taking accurate measurements is a crucial step.
Before you begin:
Good preparation ensures accurate and reliable measurements for creating the pattern.
Make sure the person does not lean over and that the tape measure remains perfectly straight.


Ask the person to breathe normally to obtain a realistic measurement.

Make sure the tape measure remains parallel to the floor to avoid errors.
How do you measure the bust circumference?

Place the tape measure at chest level, passing over the two fullest points of the bust. Make sure the tape measure is perfectly horizontal (parallel to the floor).

This measurement is essential for adjusting the fit of a bodice or jacket.

This measurement is essential for adjusting the fit of a bodice or jacket.


The arm should be bent for an accurate result.
Essential for designing comfortable trousers without excess fabric.
Once the body measurements have been taken, it is essential to add an ease allowance to ensure the garment is comfortable.
Examples of recommended ease:
The ease varies depending on the garment style: close-fitting, loose or fitted.
La liste suit le catalogue et se met à jour toute seule. Les patrons en PDF sont envoyés par courriel, les patrons papier sont à retirer au magasin.
Sewing pattern – Suzane Shorts
 Sewing pattern - Siam trousers
 Sewing pattern – Cooper T-shirt
 Sewing pattern – Carolyn Shirt
 Sewing Pattern - Luna Bag - The modern and trendy half-moon bag
 Sewing Pattern – Rainbow Gentleman - Dog Bow Tie
 Sewing Pattern – Harmonie Pants
 Sewing Pattern – Juliette Dress
 Sewing Pattern – Laurens Pajamas
 Sewing Pattern – Victoria Pants
Le patronage s'apprend avec une latte équerre graduée, sur son propre tracé. Les horaires, les prix et les places restantes viennent du calendrier de l'atelier.


On trace le patron aux mesures du corps, on construit la base, puis on la transforme. Le vêtement part de vos mensurations et pas d'une taille moyenne.
On part d'un patron qui existe déjà et on apprend à le couper, à l'assembler et à le finir. C'est le bon point de départ si vous n'avez jamais cousu.
Voir les cours de couture (5)La règle courbe et la latte perroquet tracent les encolures et les emmanchures. Le reste tient dans une boîte à couture.

Un mannequin réglé à vos mensurations montre l'aplomb et le tombé sans qu'il faille se regarder dans un miroir en tenant les épingles.
You might also like


